The outer door to the office had a problem: sometimes, it wouldn’t lock properly. It’s one of those doors that has a mechanical automatic closure system, but the system was worn down and would sometimes not close and properly lock the door. The result, a security risk: a distracted employee could leave the office and forget the door unlocked.
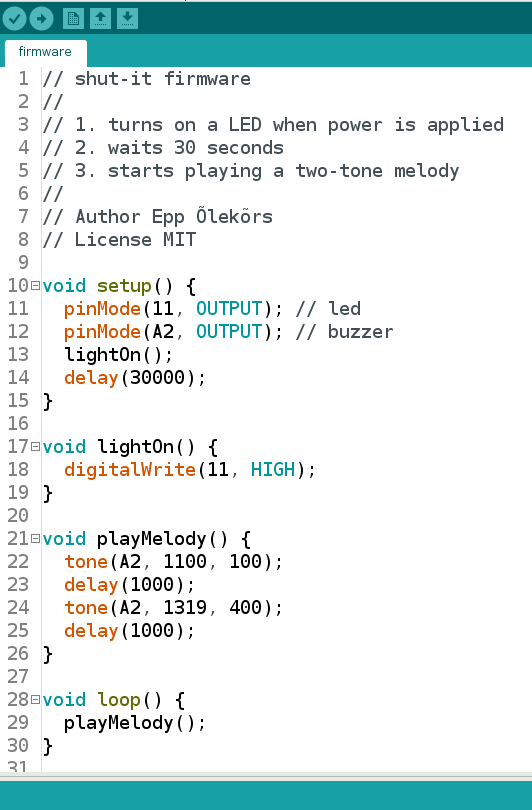
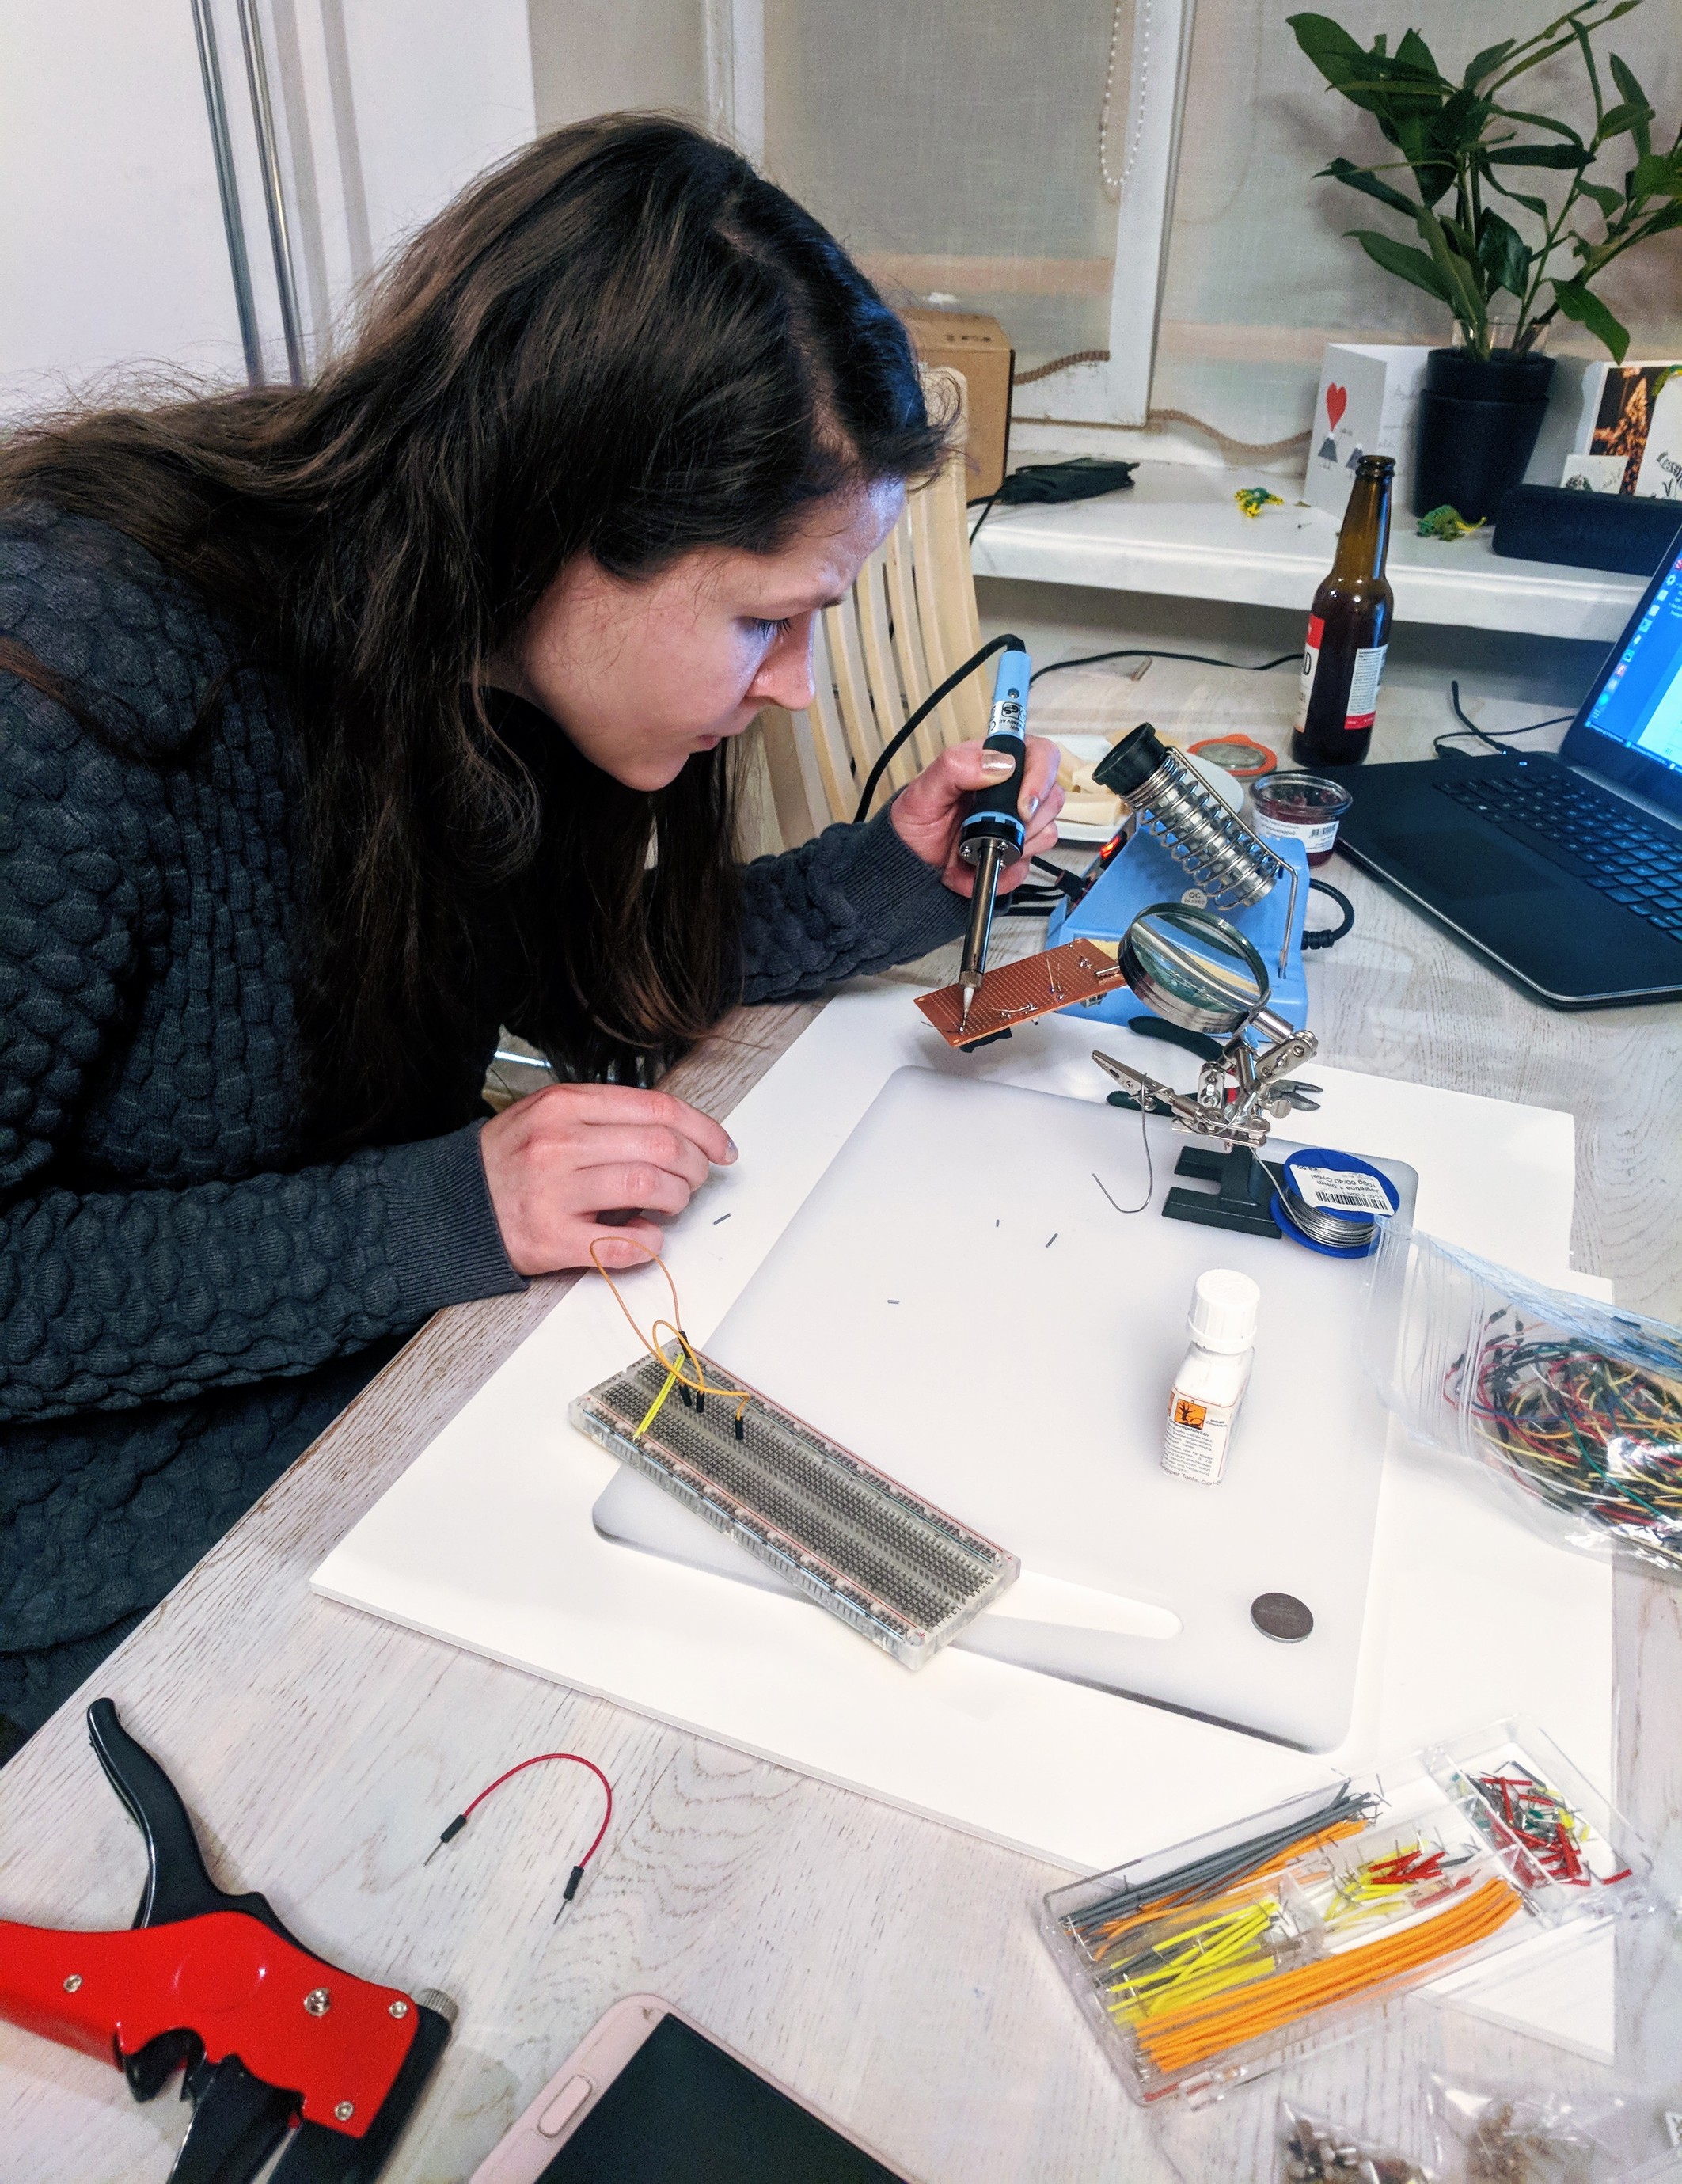
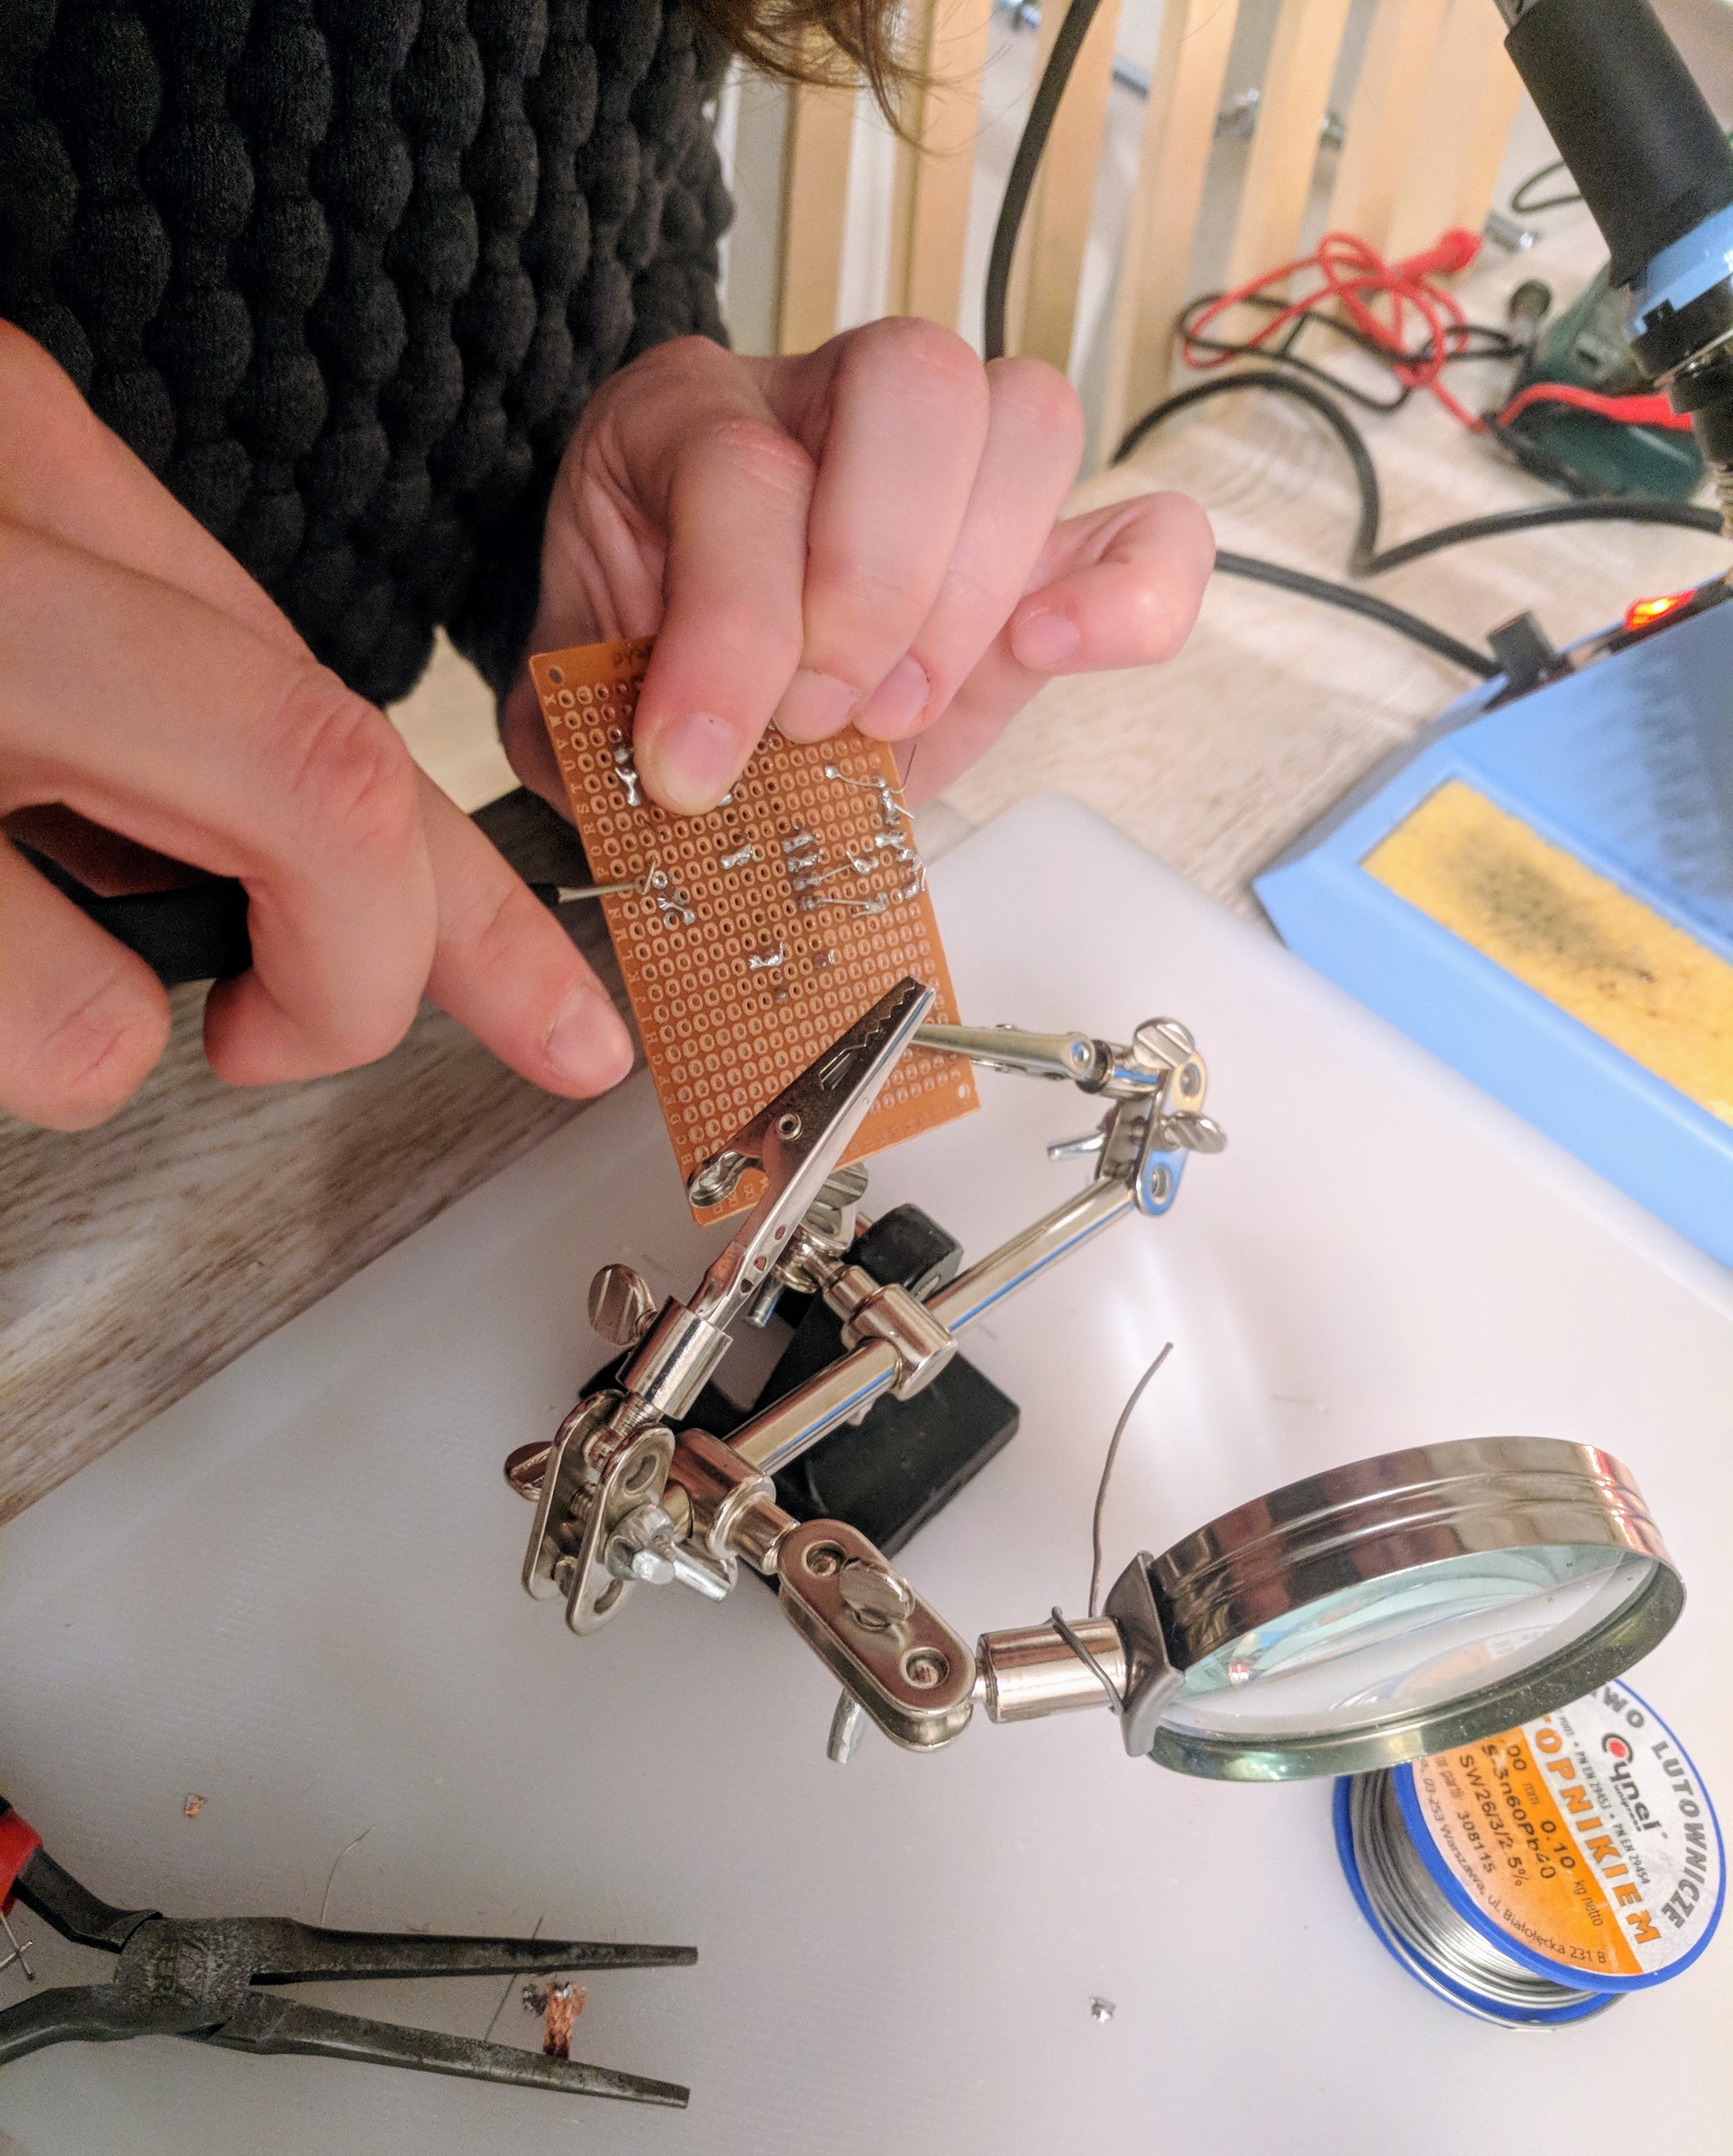
To mitigate this issue, I decided to build a small, simple DIY door alarm, that would alert employees when the office door had been left open for a prolonged period of time. This was the perfect practical project as an introduction to digital electronics and Arduino for @epplkrs, a graphical designer who wanted to learn about Arduino. She did most of the prototyping, soldering and product design and built her first real Arduino product.
Requirements
Build a small door sensor that would start beeping when the door is open for too long.
- Small form-factor (can be attached to a wall)
- Monitors the state of the door (open / locked)
- If the door has been open for longer than 30 seconds, start beeping annoyingly until someone comes and shuts the door
- Runs on batteries
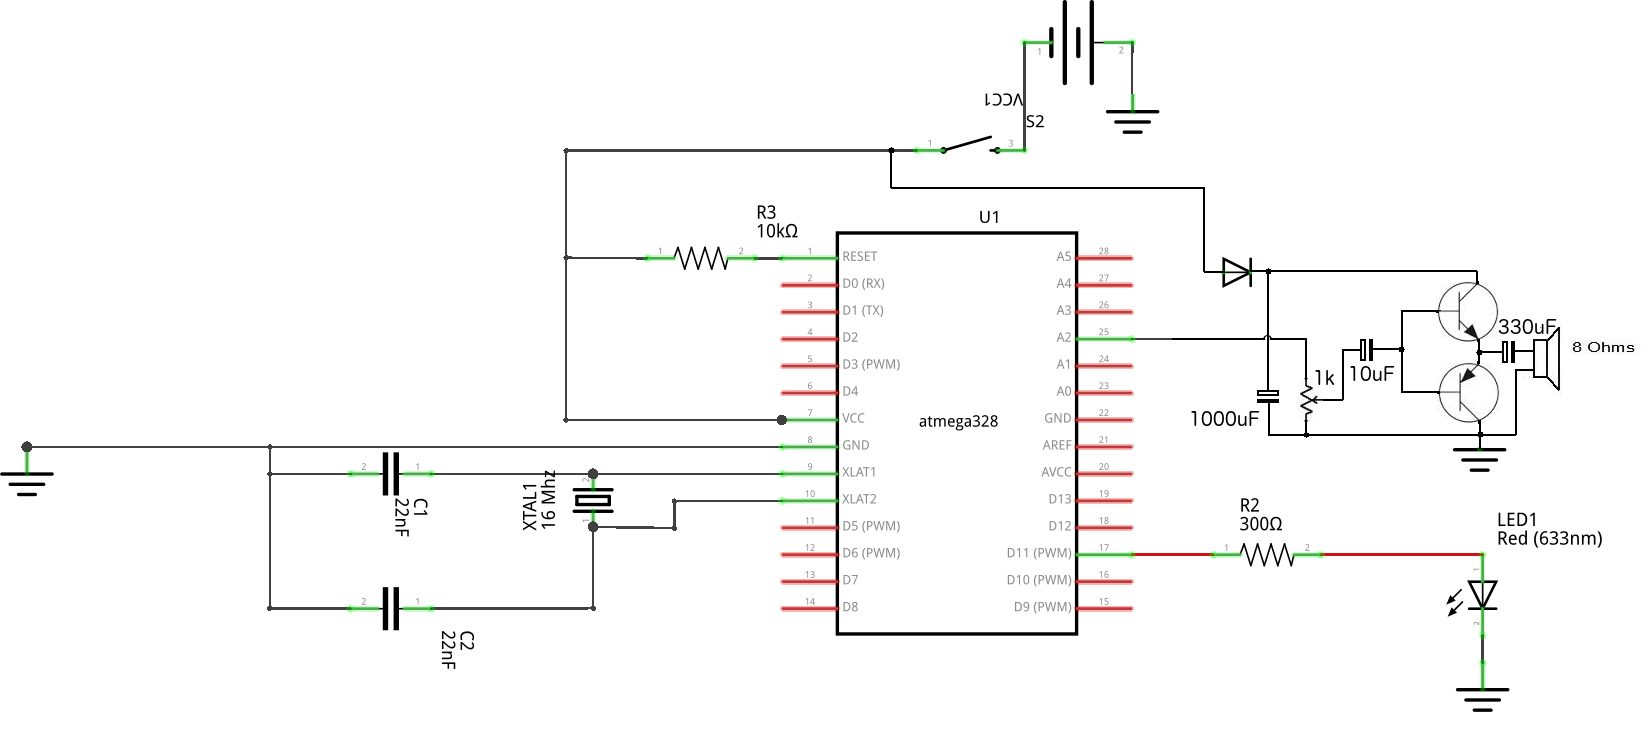
Considering the requirements, we settled on the following design:
- Arduino as “the brain” - Atmega328 on a breadboard
- Runs on 3 AA batteries (4.5V)
- Project installed in a small paper box (taped to the wall), with an extending sensor wire
- Sensor (reed switch with a magnet) attaches to the door to monitor door state
- When the door is open, the reed switch activates and powers ON the Arduino
- A status LED on the front panel indicates that the door is open
- If the door is not closed within 30 seconds, an internal Piezo buzzer will start beeping
- When the door is closed, the cycle repeats
Build Process
We started with a breadboard prototype: Arduino hooked up to a sensor, a LED and a buzzer.
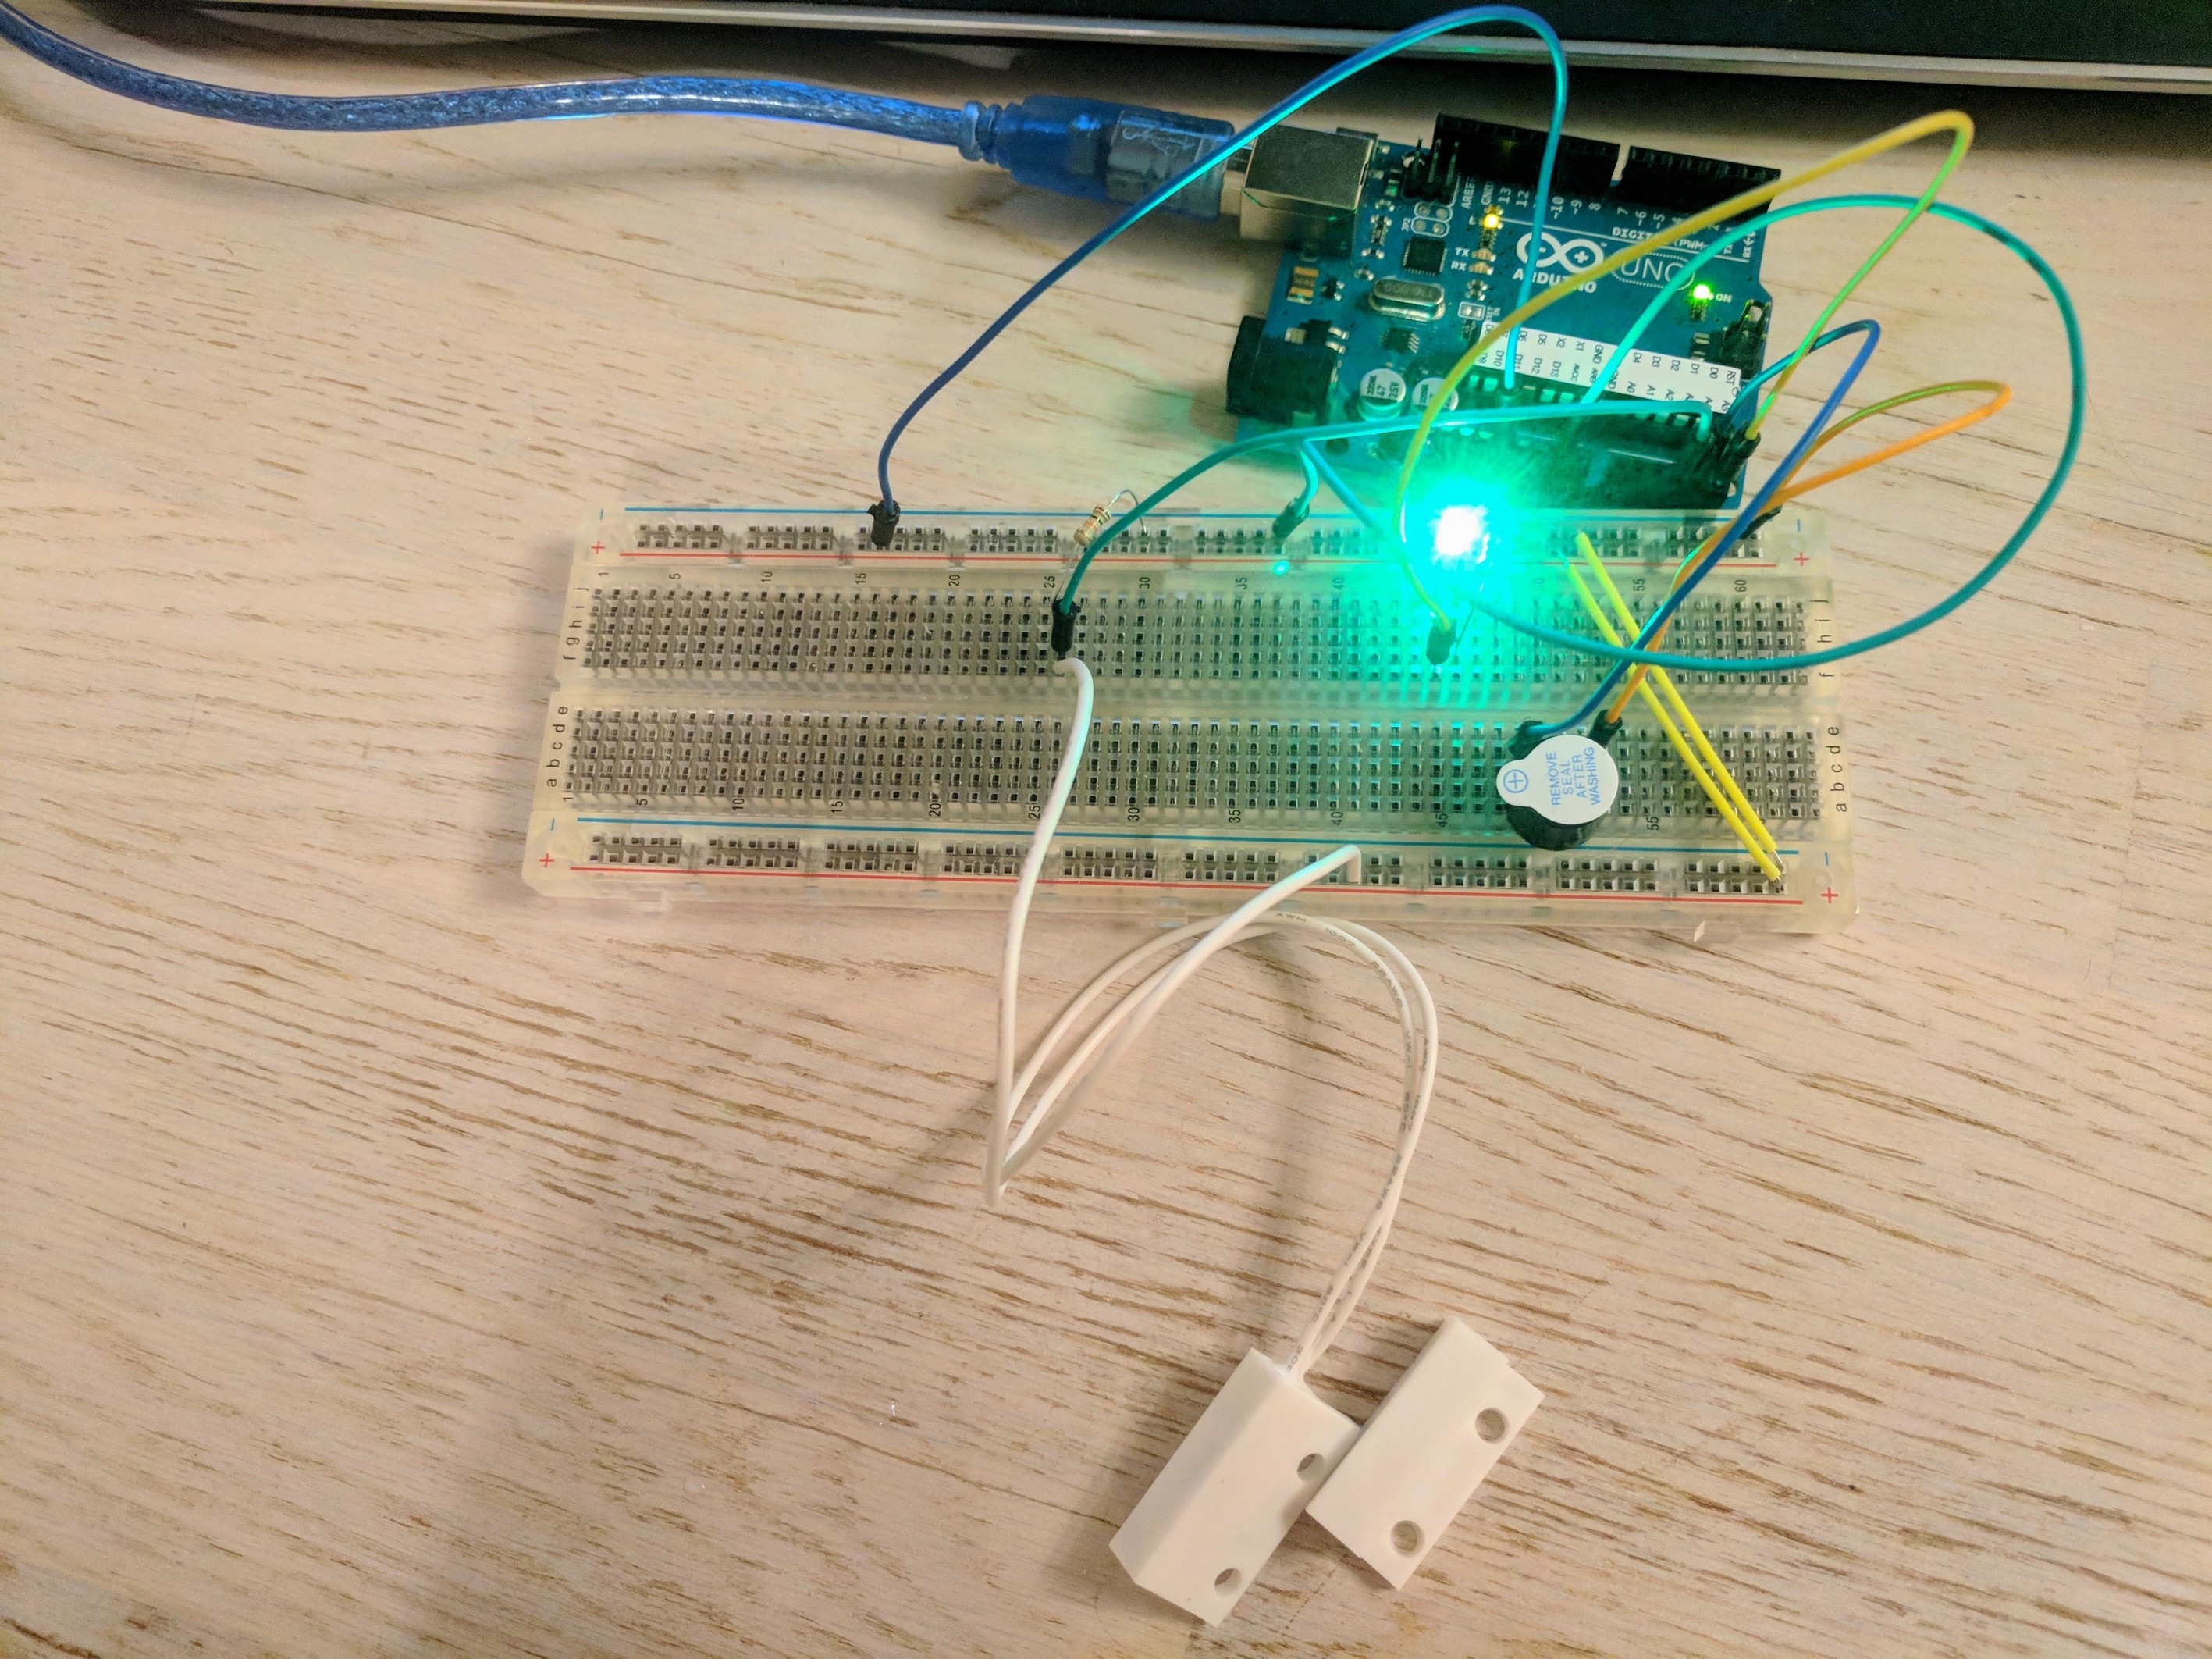
This enabled us to write and test the Arduino firmware.
With the code properly reading sensors and activating the buzzer, came the time for physical assembly: The project needed to come off the breadboard and into a permanent, fixed PCB.
The Atmega328 chip was attached to an empty PCB, with all the required I/O devices and connectors soldered onto it.
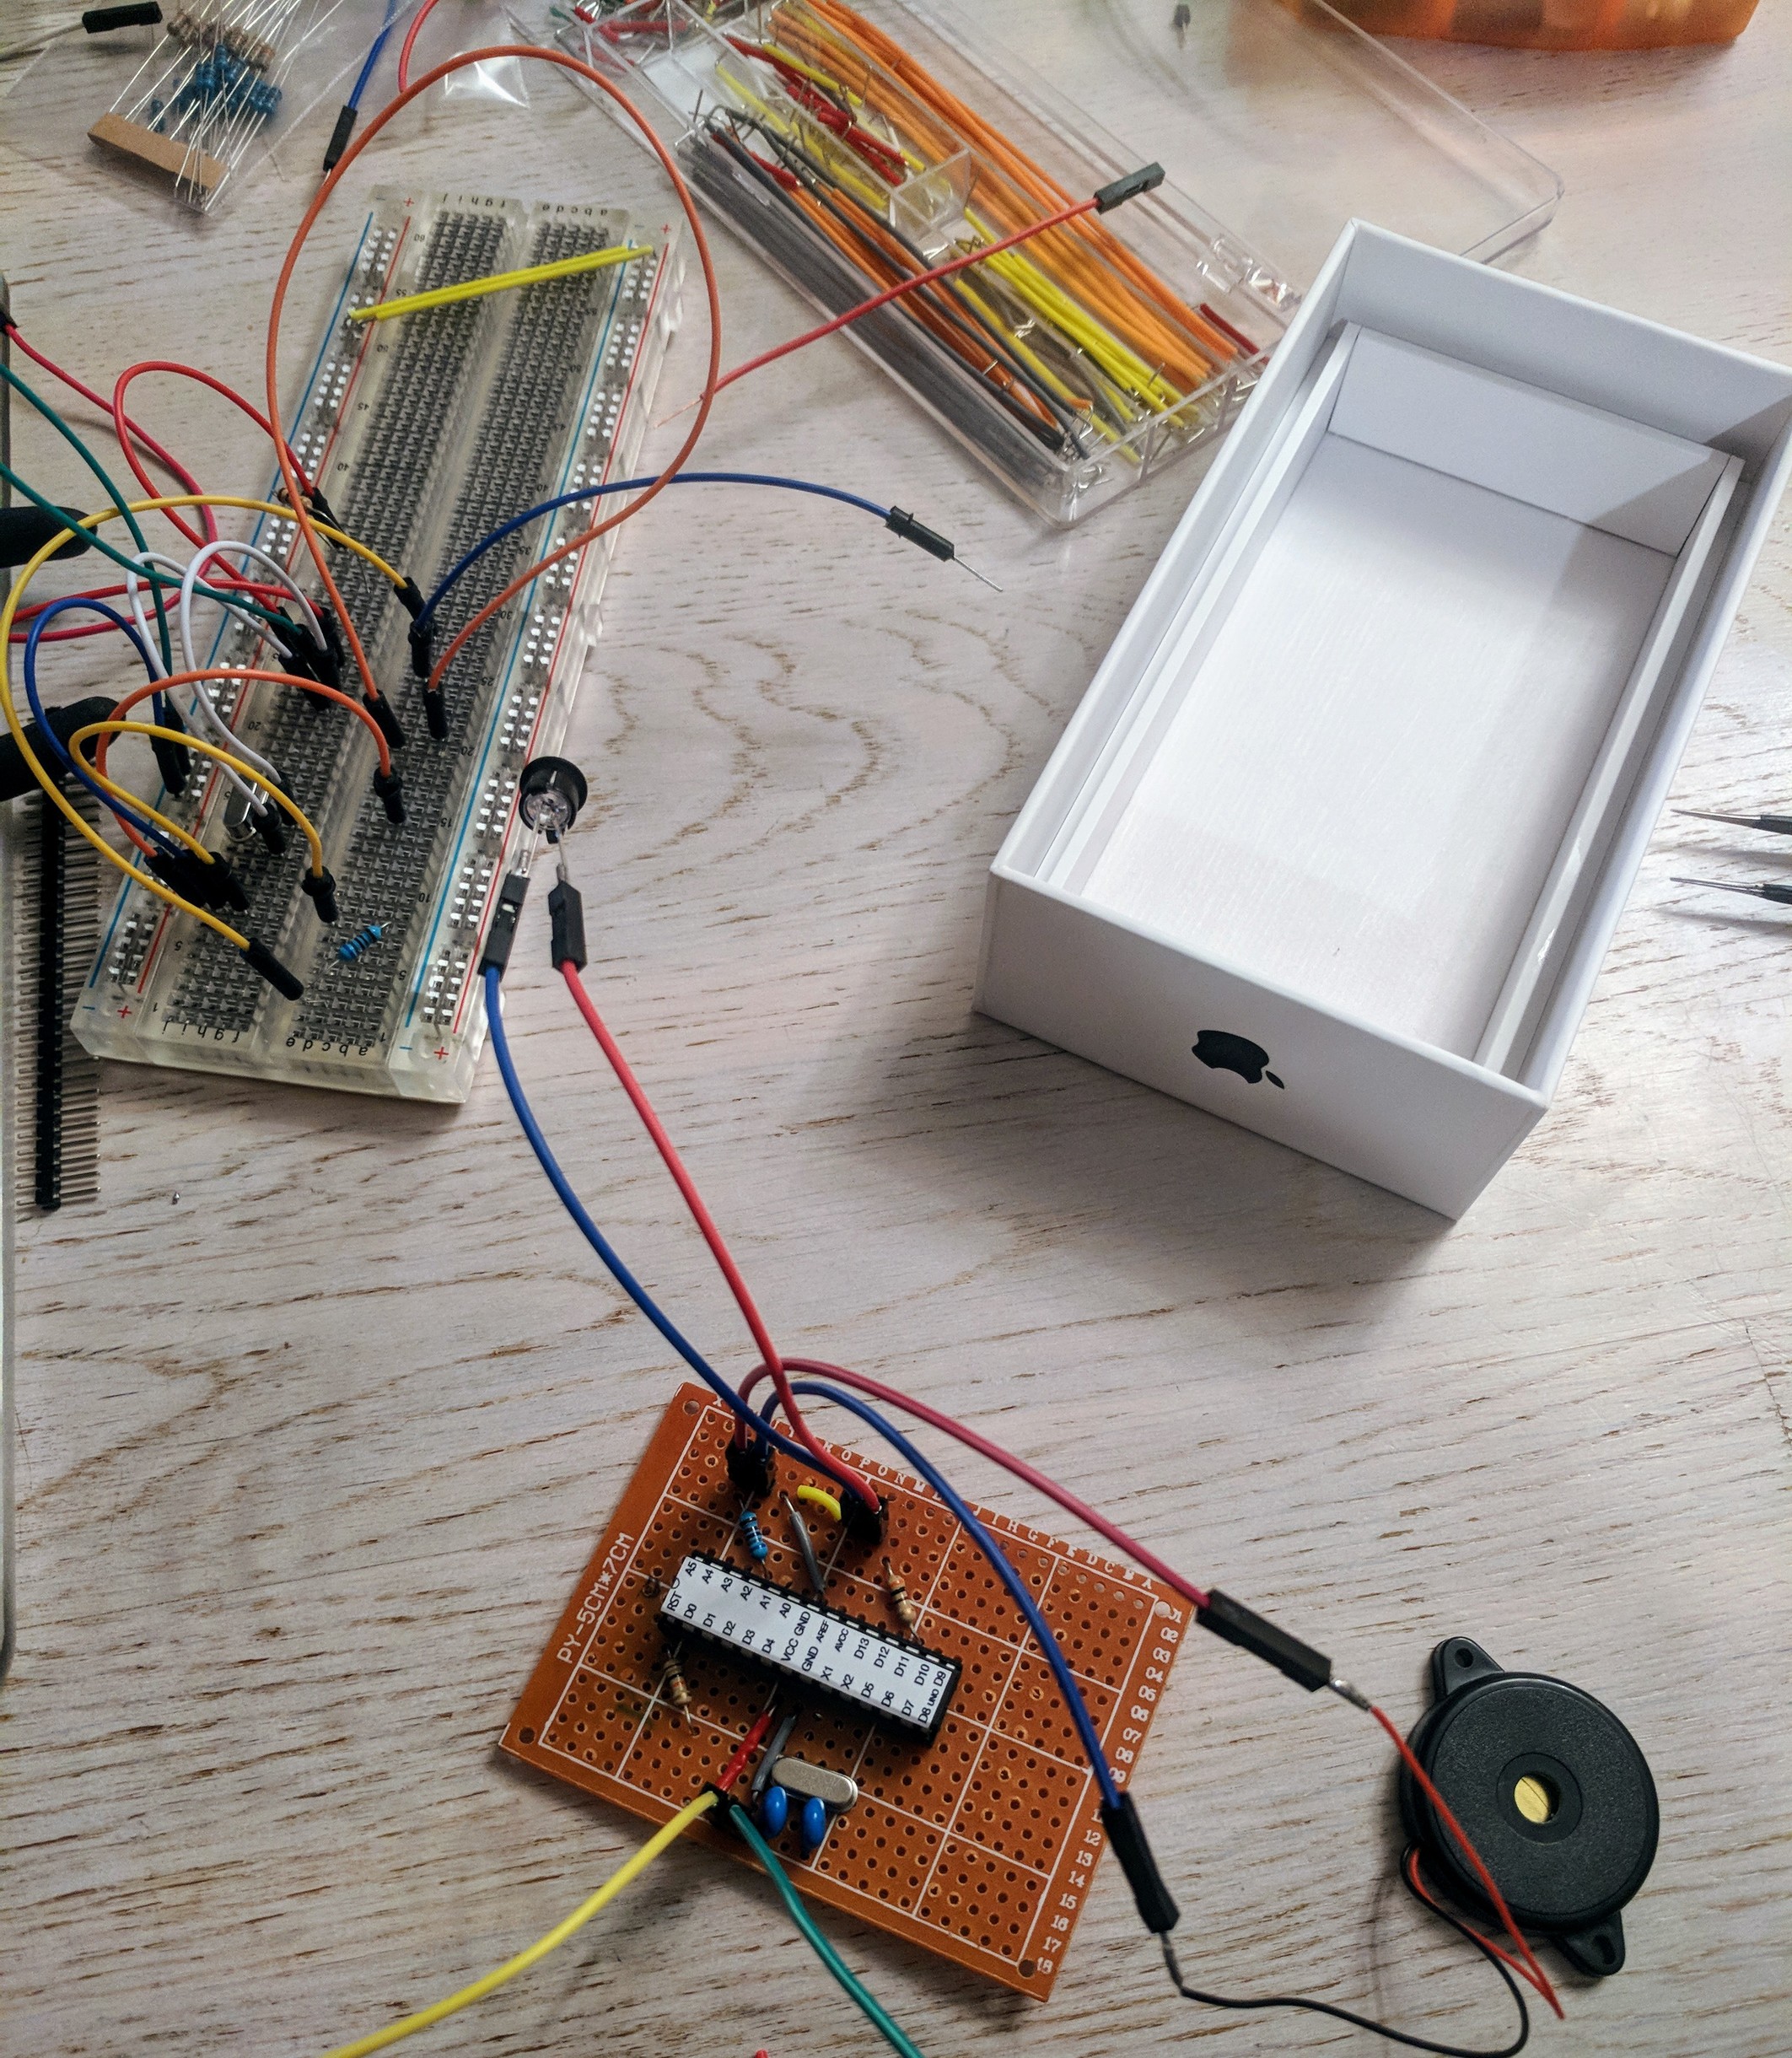
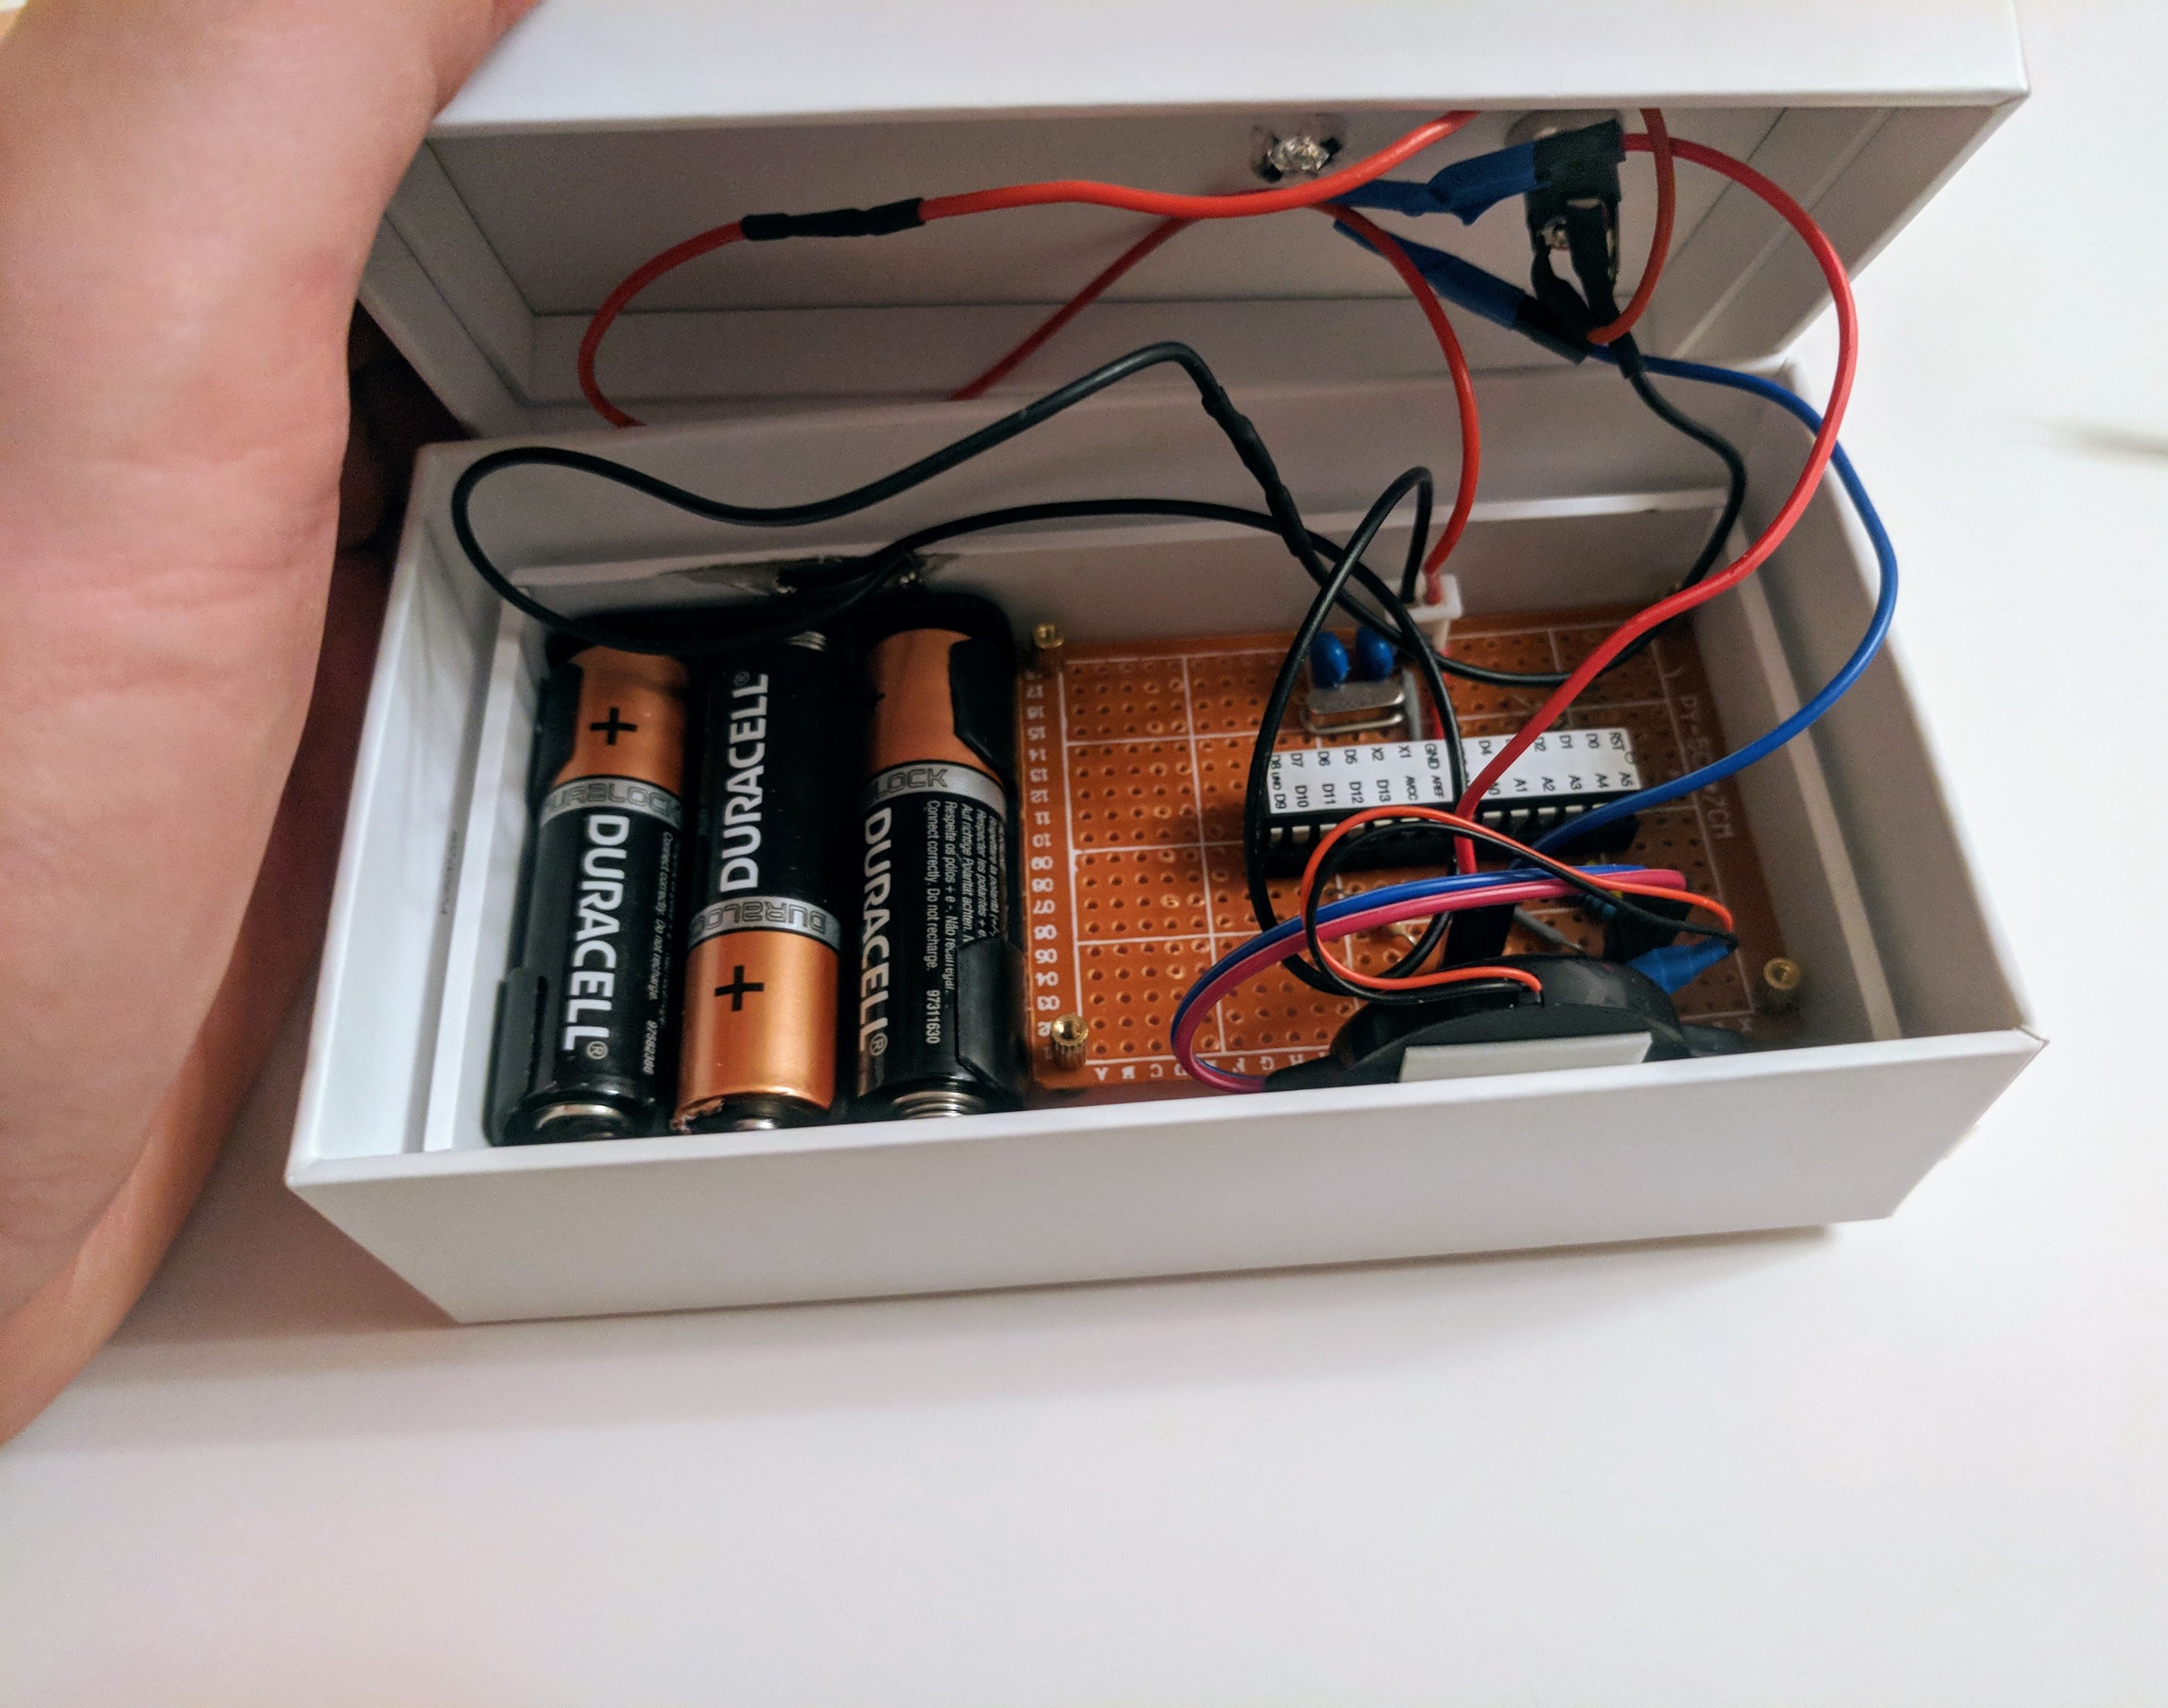
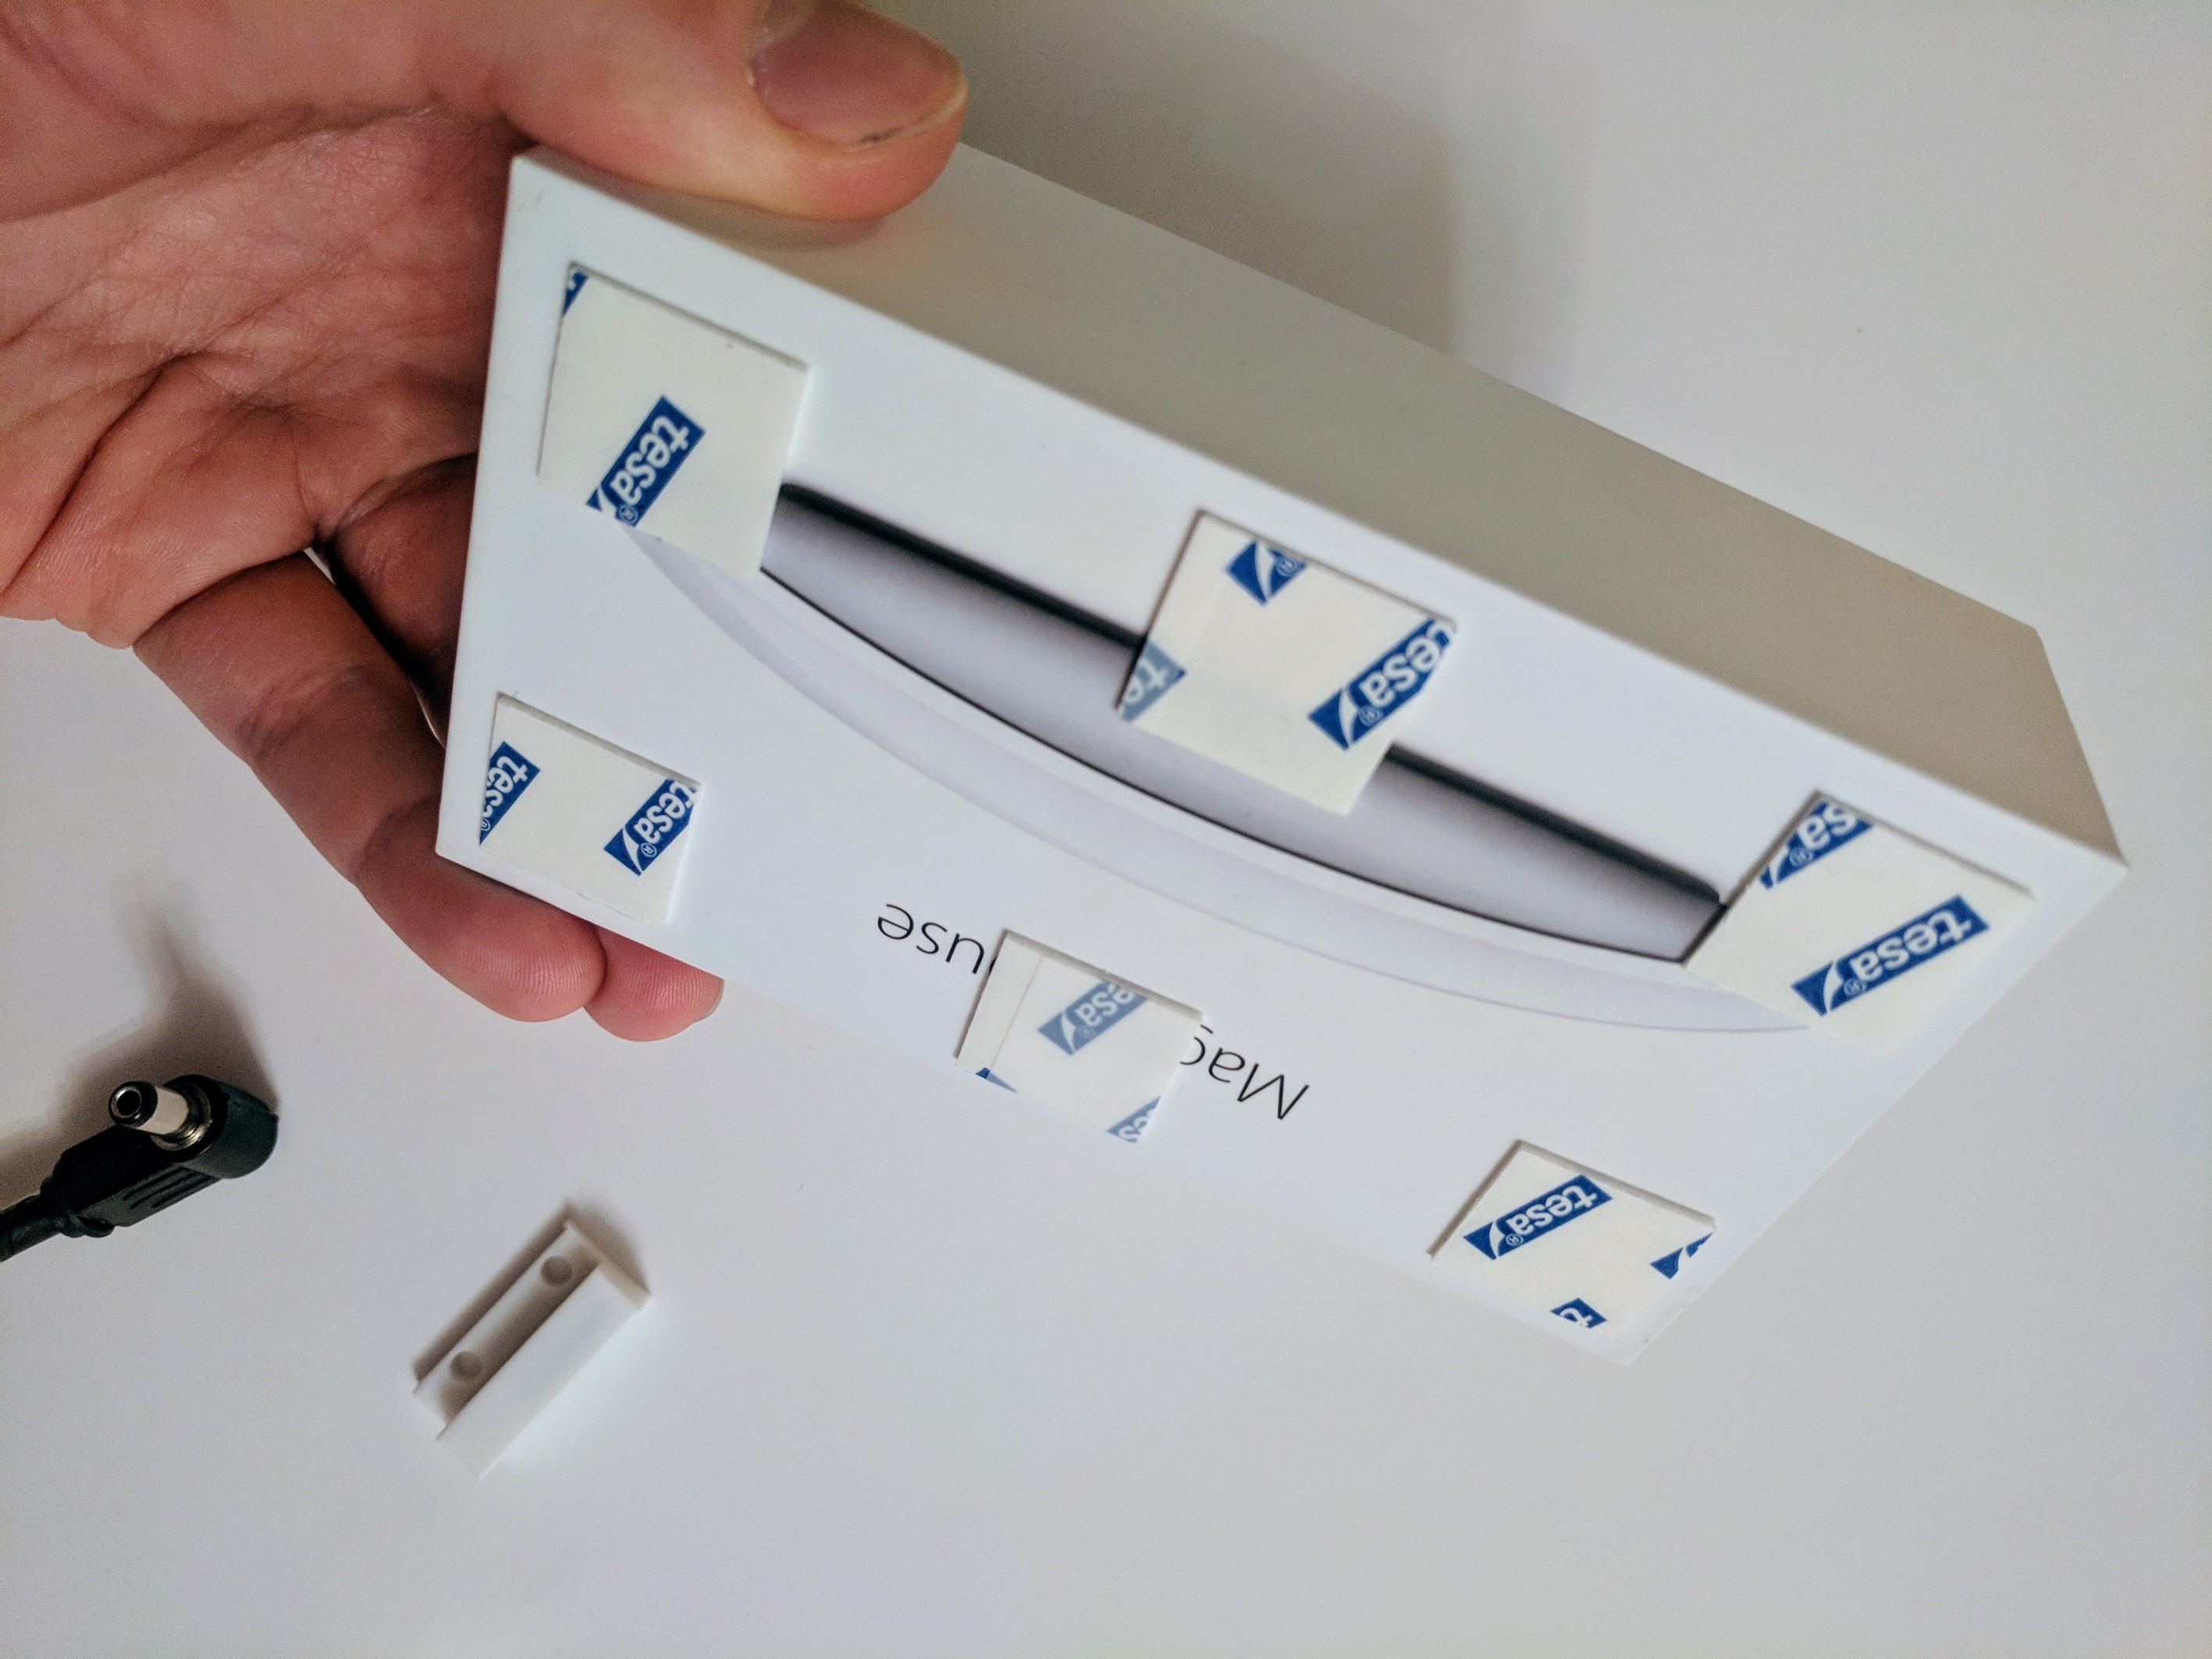
We used an Apple Mouse box as the project enclosure. As a result, the completed project was elegantly White.
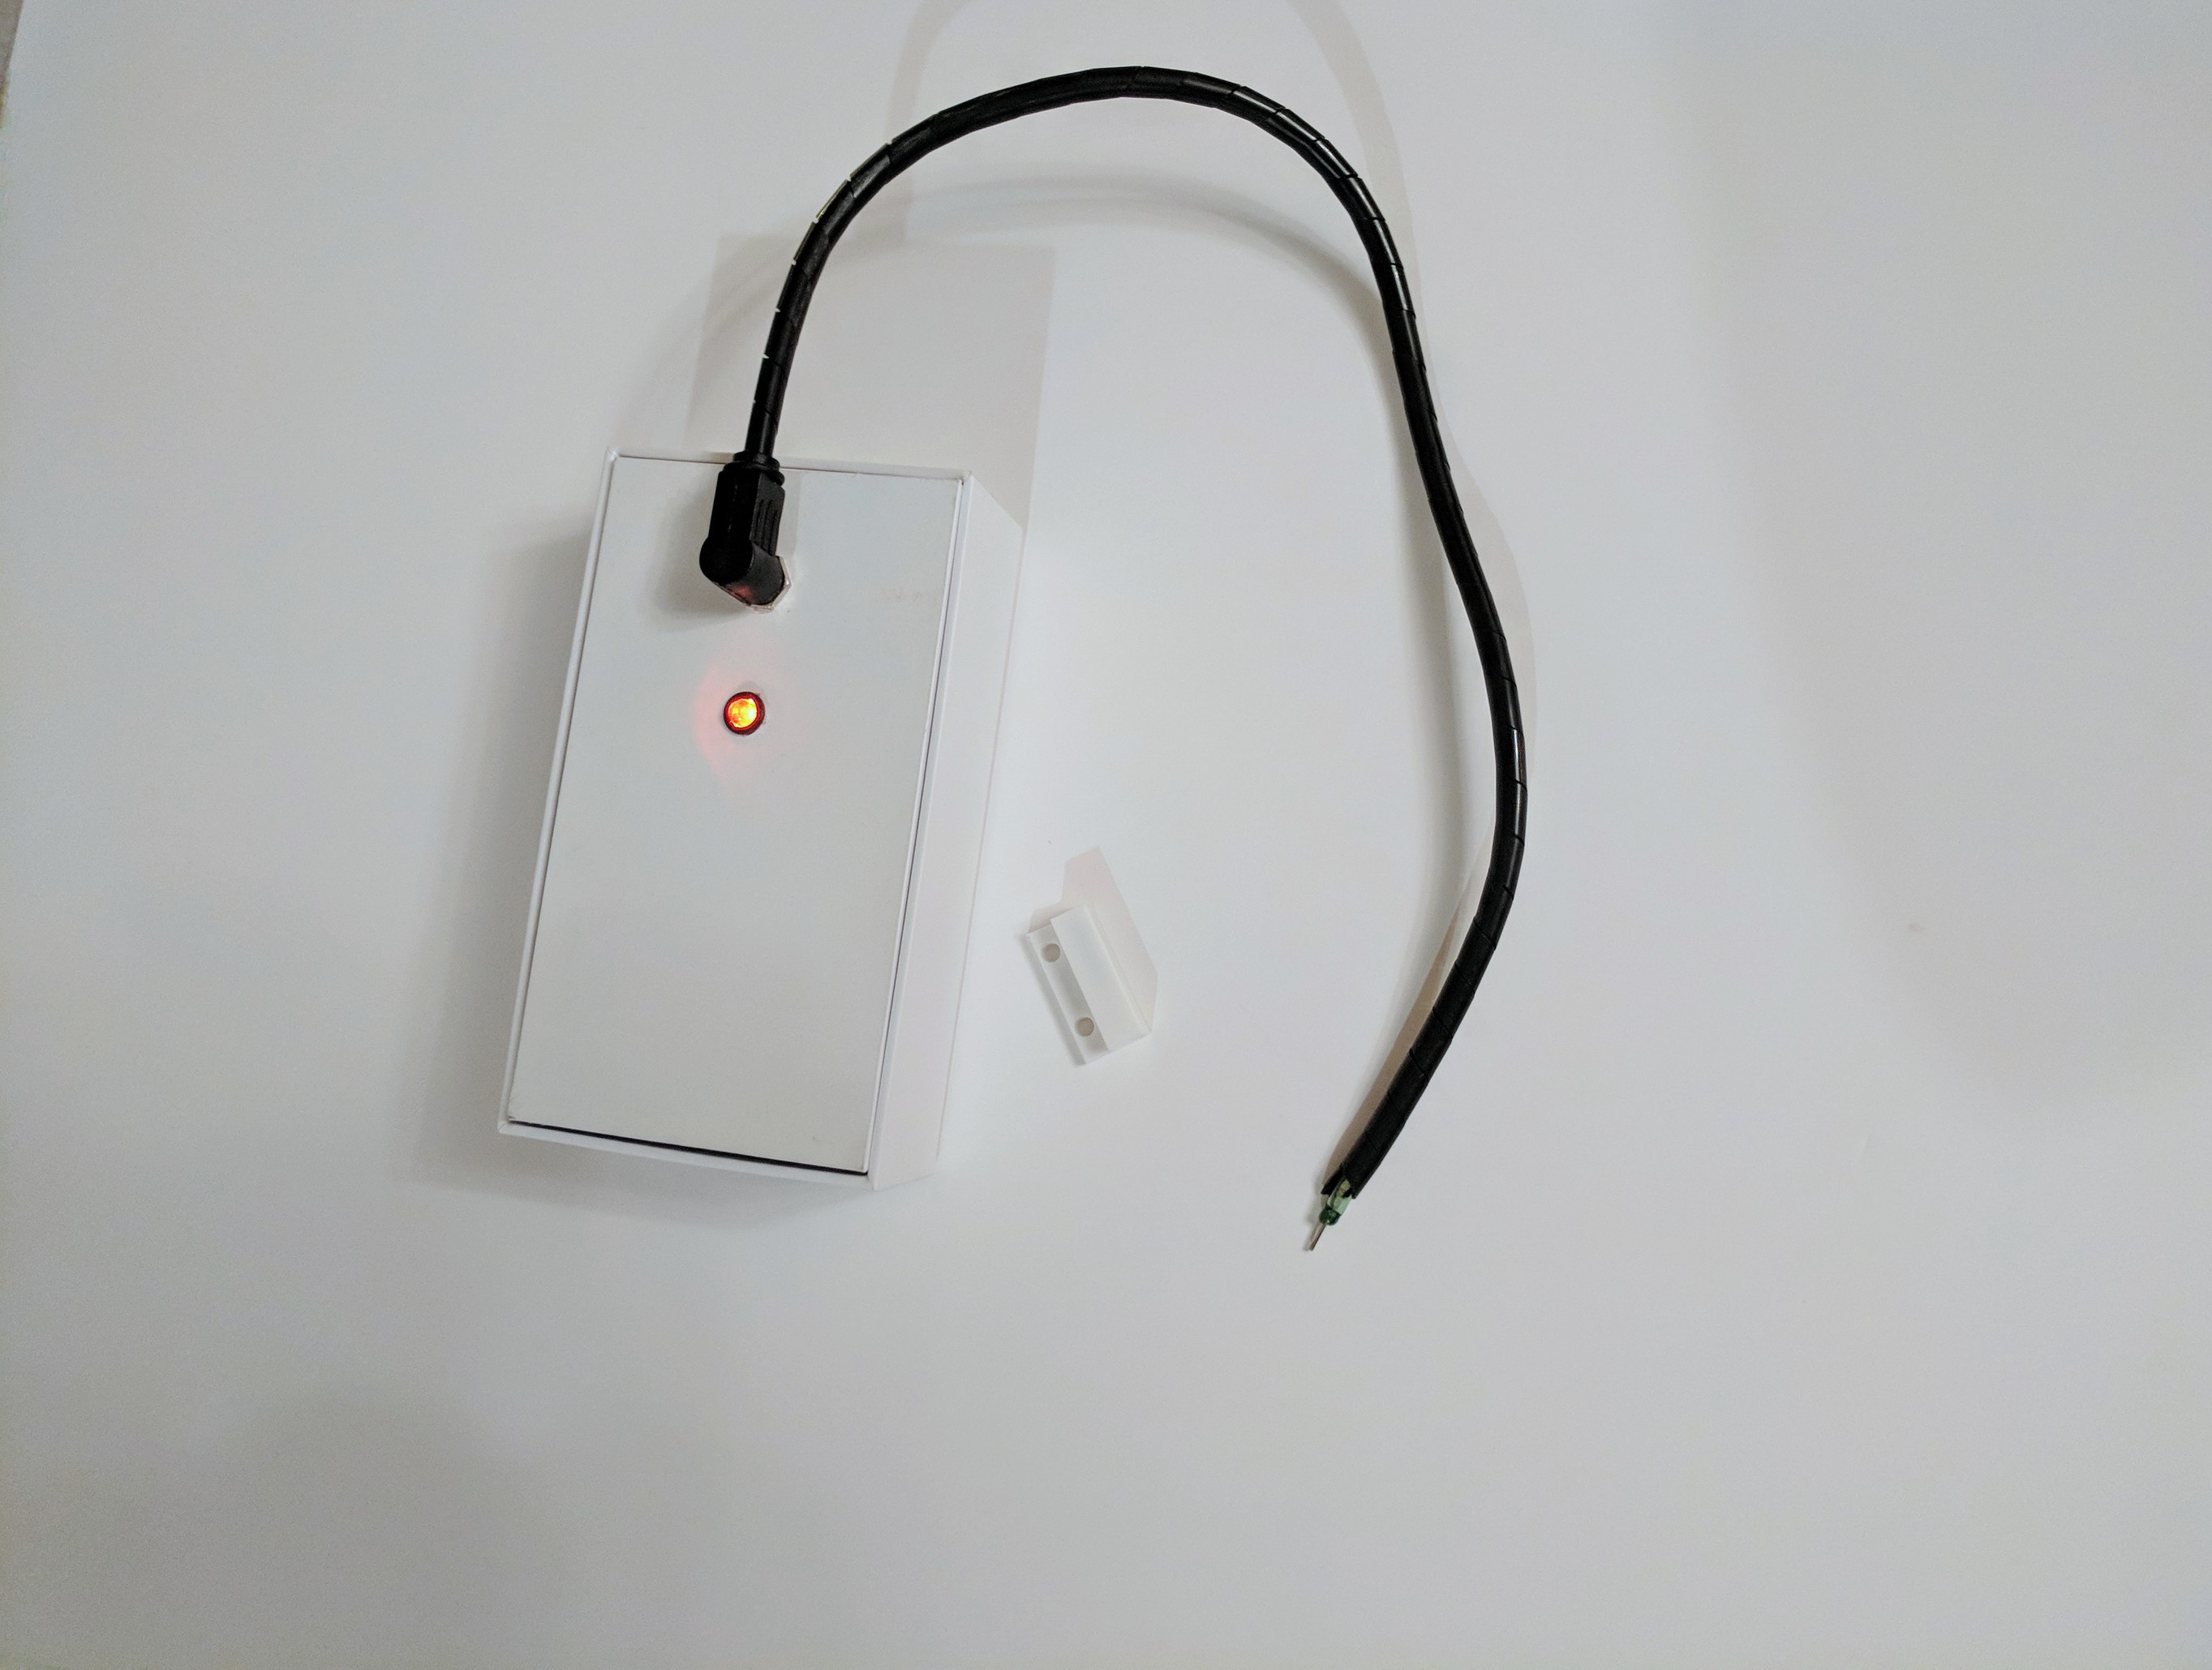
Double-sided tape to the back of the box keeps the project on a wall.
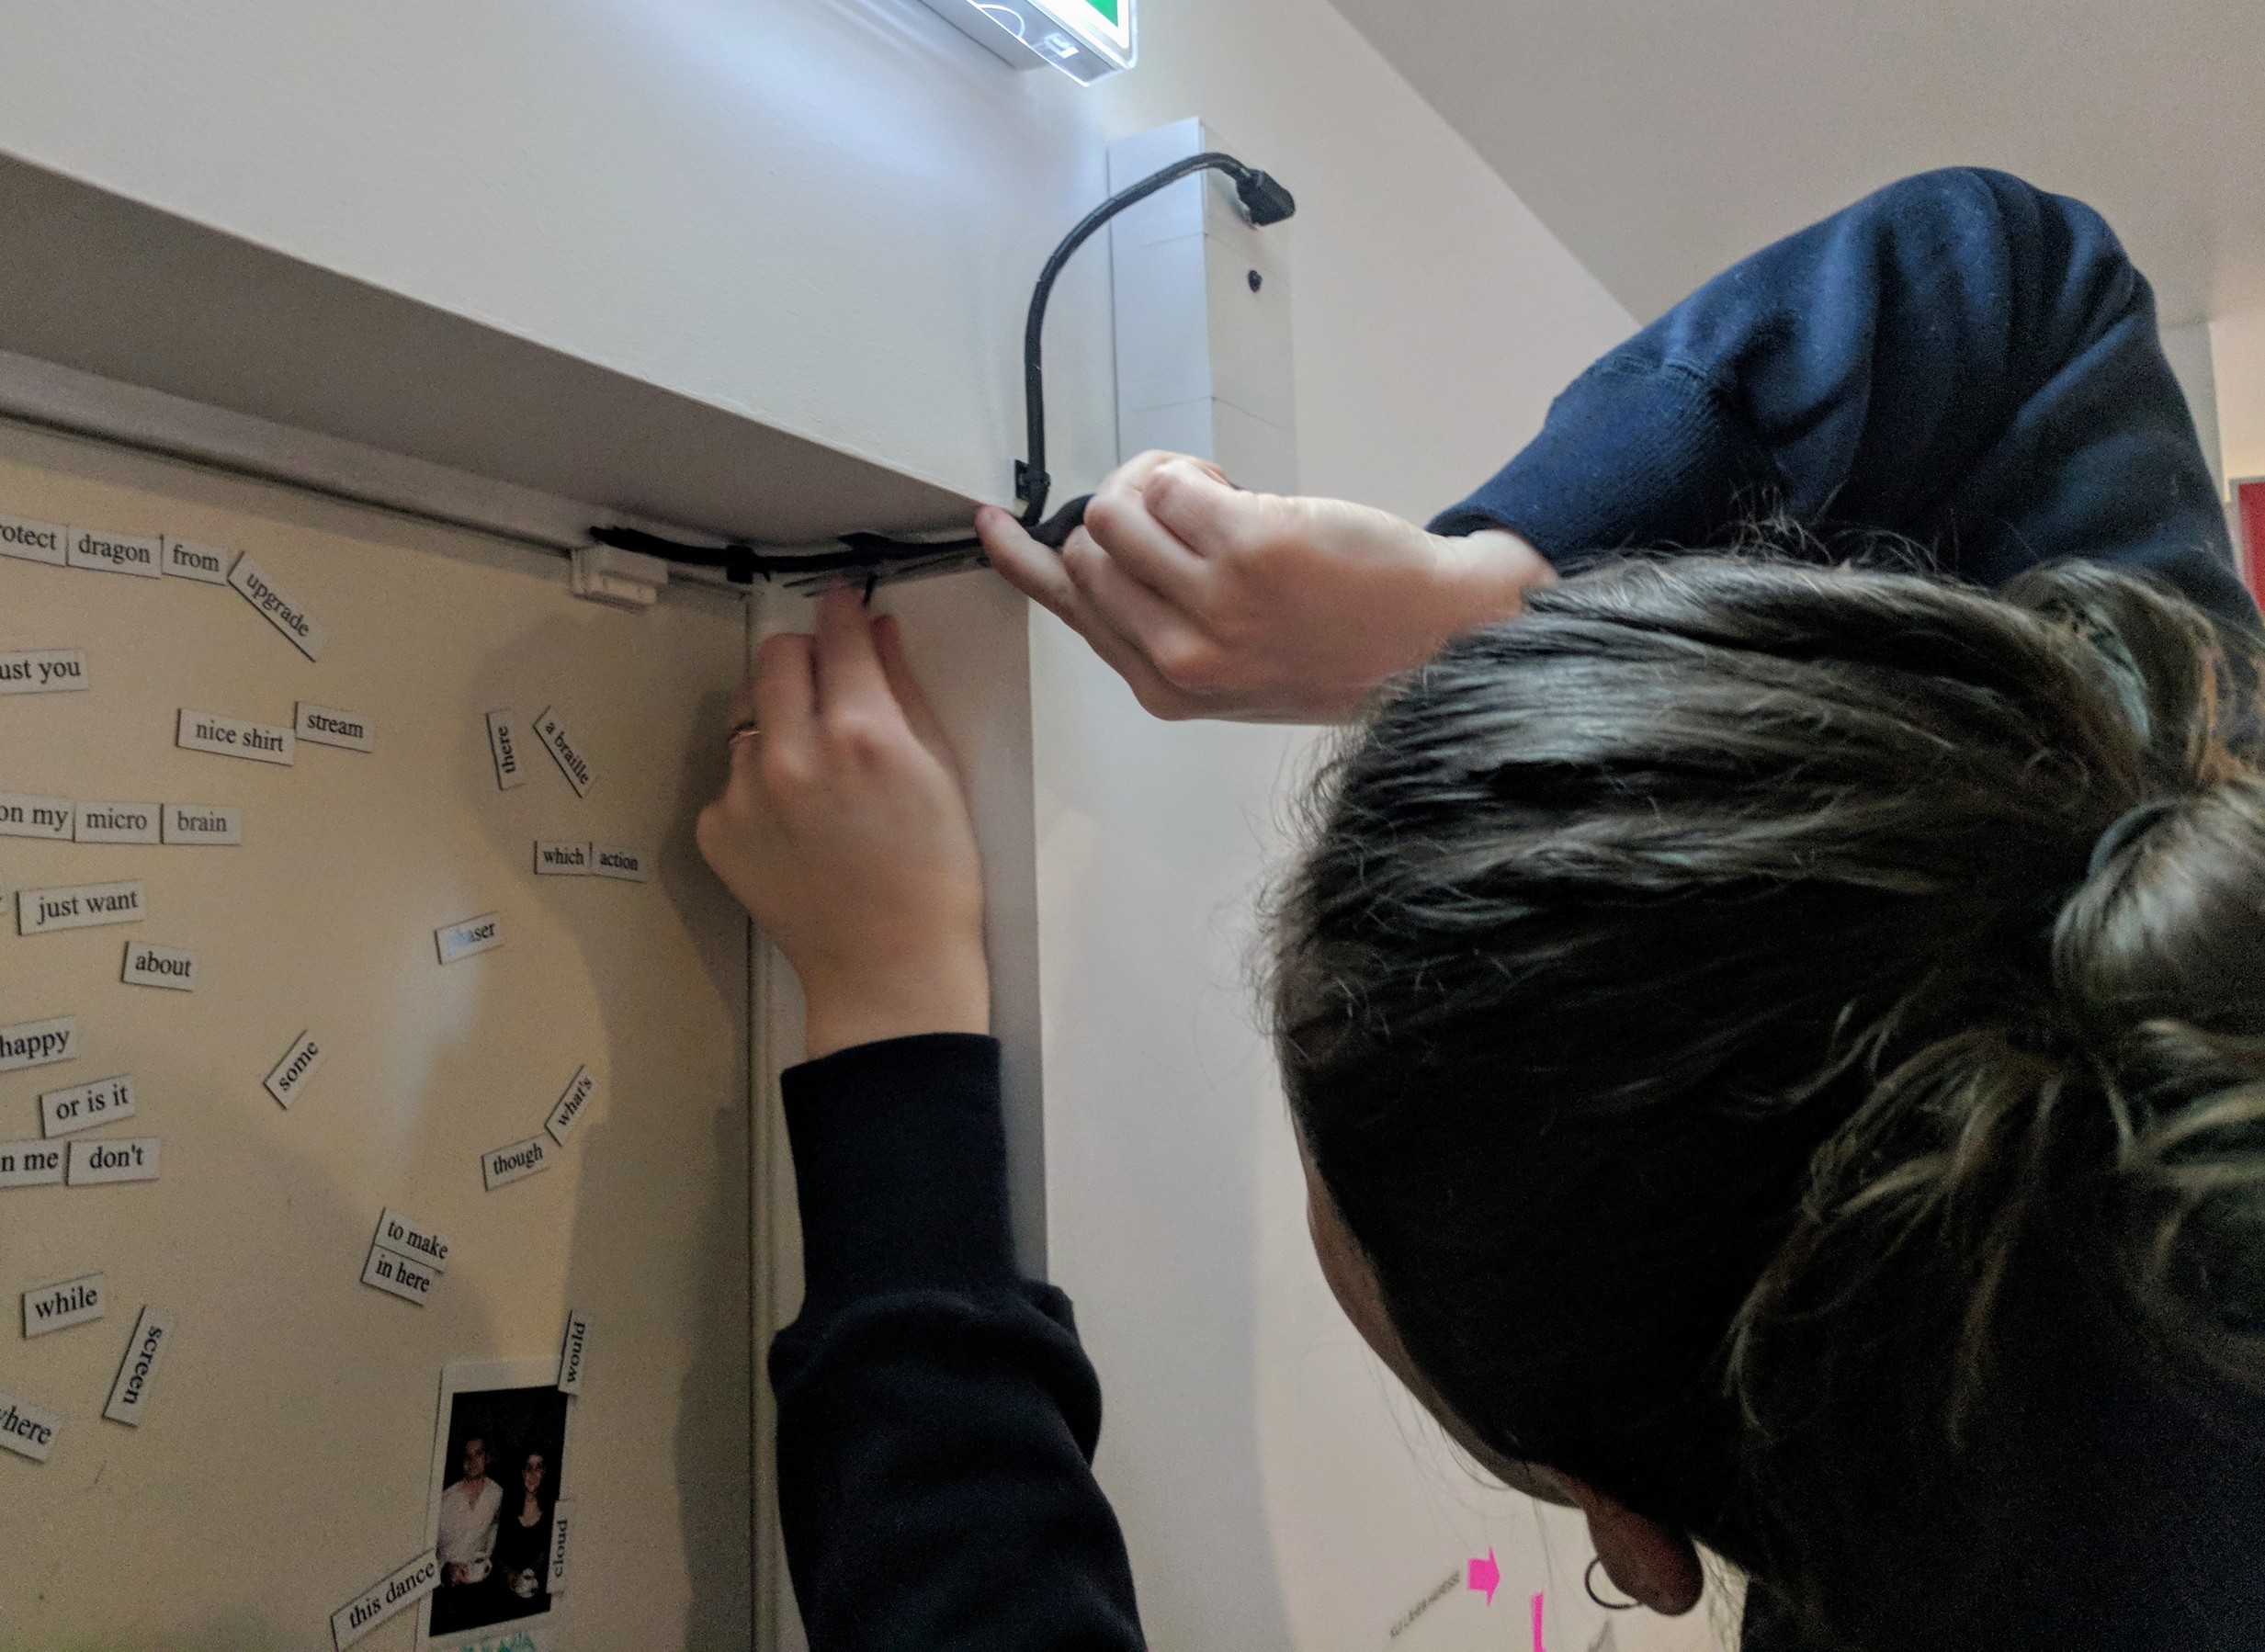
Installation
We installed the project to the problematic door; and it works: when the door is opened, the project powers ON, waits for 30 seconds and will then start BEEPING, alerting the office: the door was left open again.
Source
Project schematics and source code are available from Github under the MIT license.