The topic of encryption and privacy has been widely focused on after the Snowden revalations. Suddenly, people realize that much of everything we do online is done using insecure channels. One of those channels is unencrypted web traffic.
In this tutorial, we’ll look at how you can set up an encrypted web page quickly and for free. We will provision a new virtual server, install a web server and set up HTTPS.
You Will Need
- A computer with a SSH client (Linux or Putty on Windows)
- A domain name you control
- A Ubuntu 14.04 Server or a credit card
- Basic knowledge of Ubuntu server administration
Provisioning a Server
If you already have a server, skip this step.
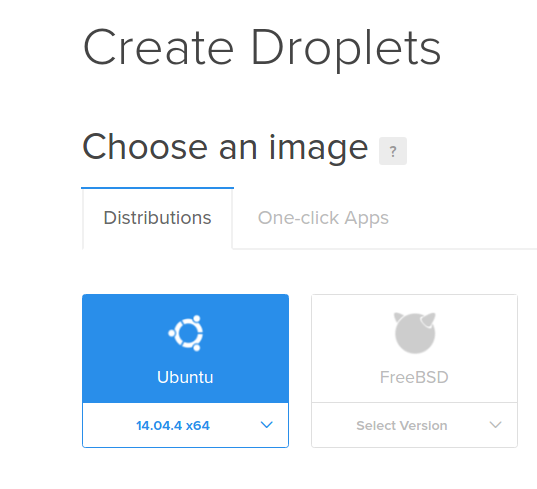
We’ll create a new web server using DigitalOcean. Log in to your account (or create one). Create a new Droplet using Ubuntu 14.04 as the base image.
Add your SSH key to the server and give the server a host name.
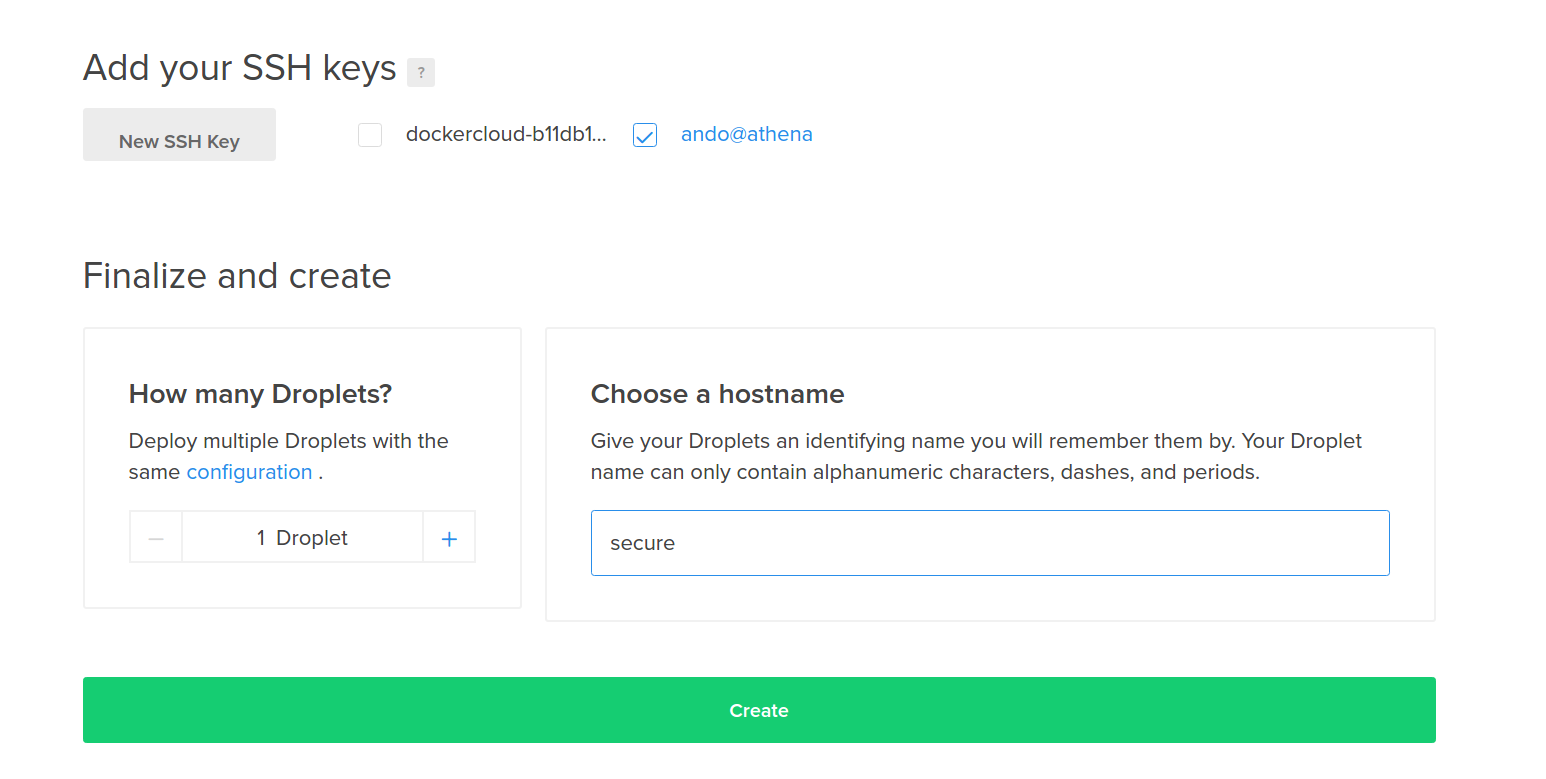
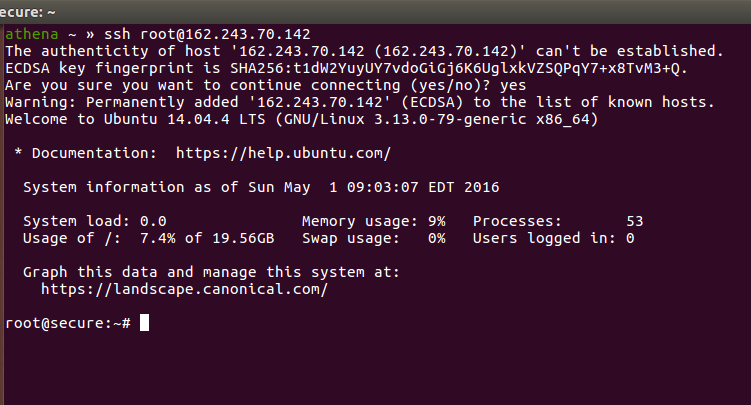
After about a minute, the server is ready. Copy the IP and log in with SSH:

Installing The Web Server
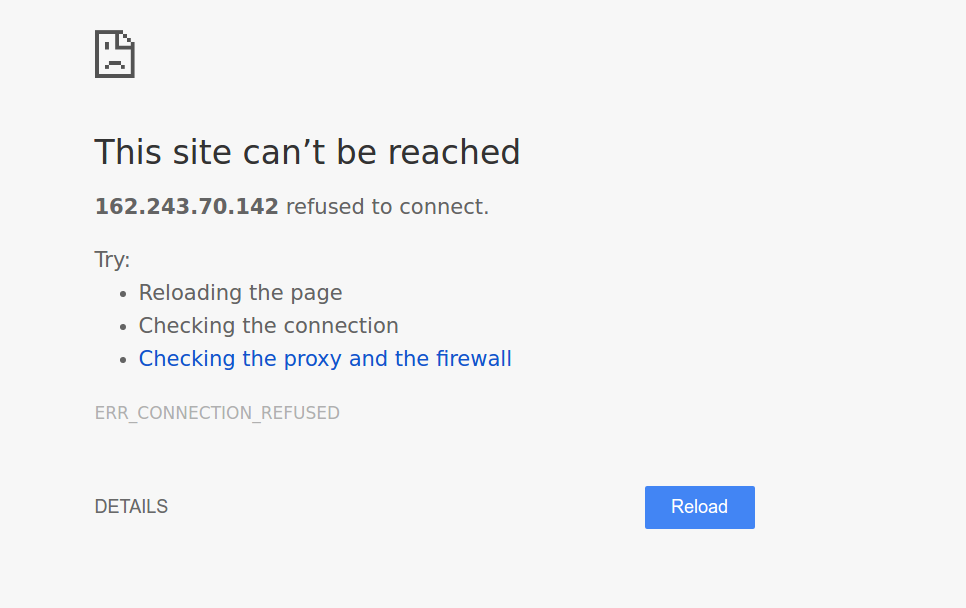
We now have a server on the Internet, but there’s nothing there yet - visiting the IP address with a browser gives an error.
Let’s install Apache, an open-source web server.
apt-get update
apt-get install -y apache2
After the command finishes, we can refresh the browser - the web server is running and displays the default welcome page.
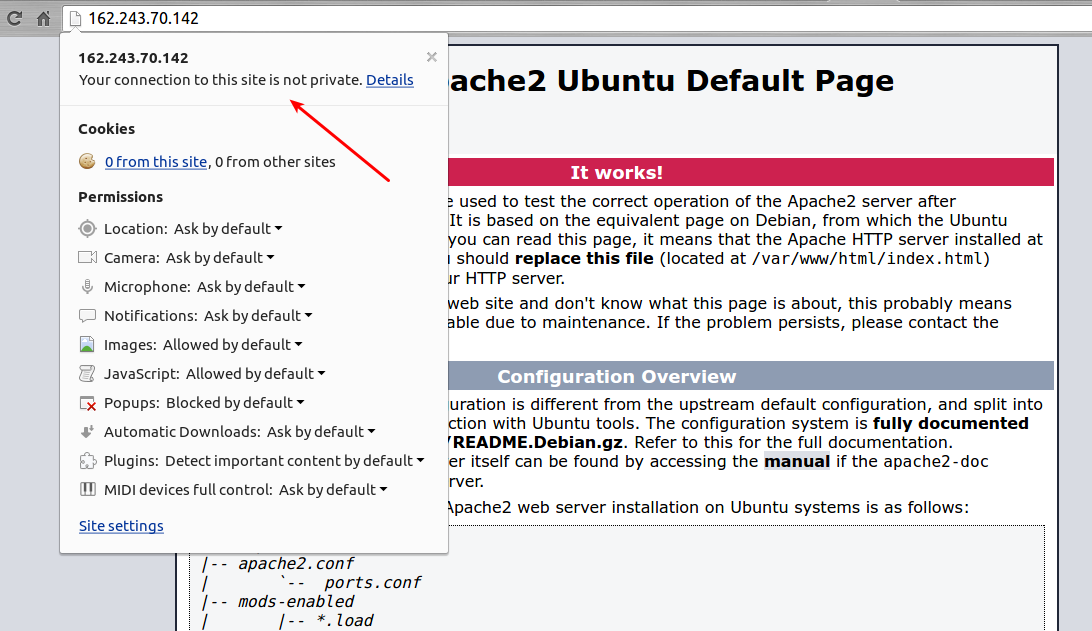
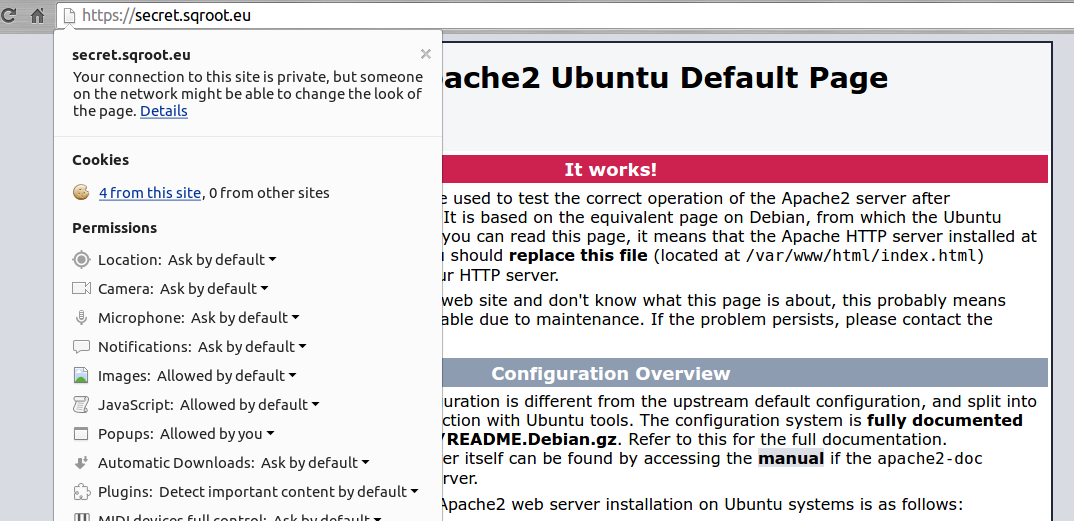
Notice that the site is running over HTTP and is not encrypted in transit. This is how much of the Internet currently looks. In practical terms, this means that if you, the visitor, browse to this page in a public airport network and I, the mean person am there too, I could see everything you do.
To avoid this and maintain communication privacy, we’ll configure the server with HTTPS.
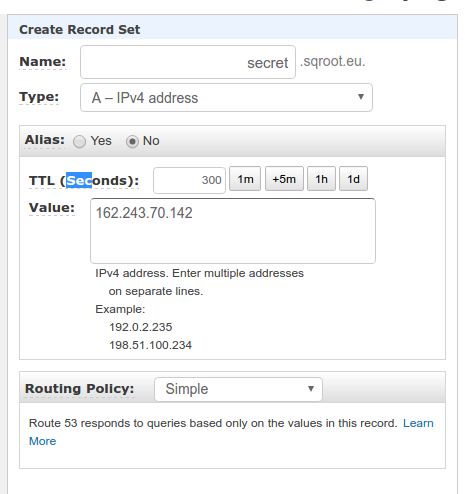
Binding a Domain
To get a HTTPS certificate, we need a domain name. Log in to your domain name server management interface and add a new A-record. I want my web page to be located at secret.sqroot.eu (1), so I added the following:
Ordering Certificates
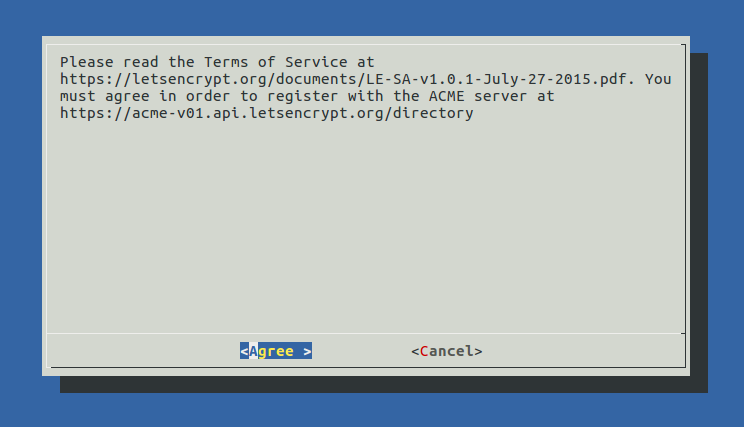
LetsEncrypt is a free certificate authority that is revolutionizing the way we think of basic SSL certificates. It used to be that people would have to pay for HTTPS certificates - cryptographic proofs of identity that “prove” the web site is who it says it is. Those certificates are needed to enable HTTPS, hence HTTPS was costing money - at least 10€ / year. LetsEncrypt was created to make HTTPS available for everyone.
Let us install the LetsEncrypt client. The client is used for making certificate requests to LetsEncrypt server as well as configuring our local web server with certificate information.
apt-get install git
git clone https://github.com/letsencrypt/letsencrypt
cd letsencrypt
./letsencrypt-auto --help
Running letsencrypt-auto will install all the dependencies of LetsEncrypt. This might take a while. When the install finishes, we’ll run LetsEncrypt again, this time in interactive mode:
./letsencrypt-auto --apache
The first screen is a warning about our web server - we have not configured the domain name for it.
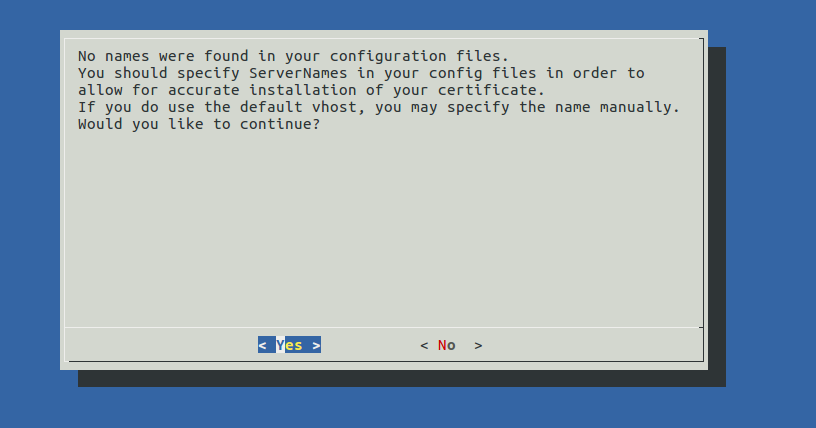
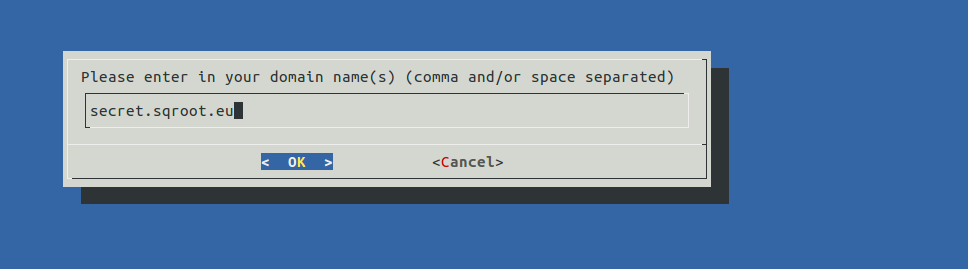
Choose “Yes” and enter the domain name you plan to use.
Next, enter your e-mail. This will be used for recovery purposes, should you loose your certificate.

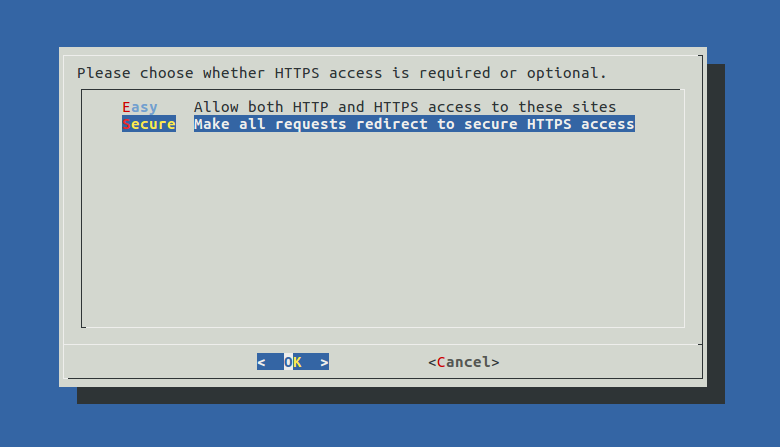
Choosing “Secure” will “force” visitors to use a secure connection. HTTP connections will be redirected to HTTPS.
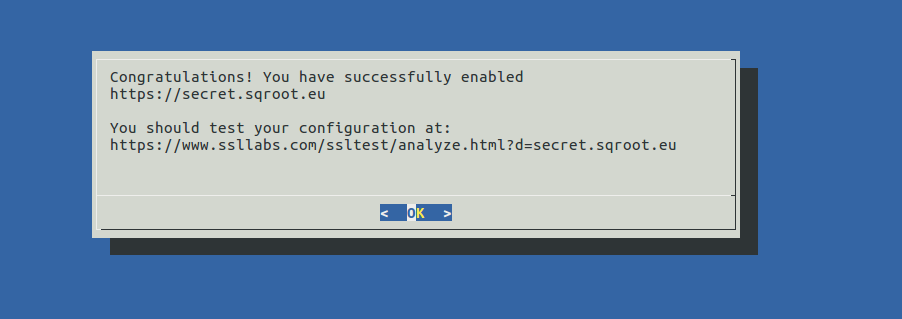
When the wizard finishes, open the domain in your browser - you should still see the same default server page, but now, over a domain name and in encrypted form.
One final thing to note - although the contents of the current page are now secure, it’s references it tries to fetch over HTTP are not. The default page loads some CSS files from an insecure (HTTP) source and the browser warns us about it.
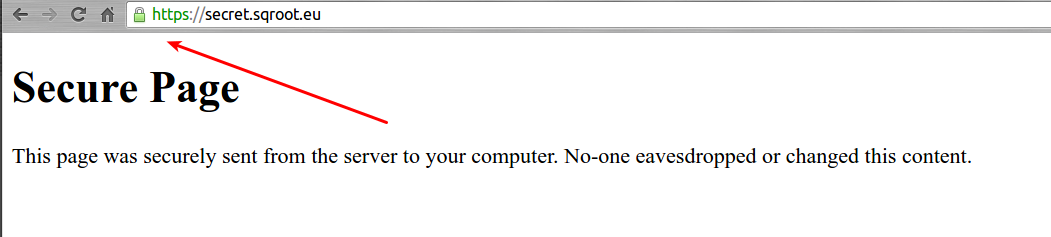
Let’s edit the file /var/www/html/index.html and replace its contents with
<!DOCTYPE html>
<html lang="en">
  <head>
    <meta charset="utf-8">
    <title>Secure Page</title>
  </head>
  <body>
    <h1>Secure Page</h1>
    <p>This page was securely sent from the server to your computer. No-one eavesdropped or changed this content.</p>
  </body>
</html>
Refresh the browser and you can now see the tell-tale sign of a green padlock, indicating a secure connection.
Conclusion
We have now successfully set up a new HTTPS web site. All traffic from that site is encrypted in transit between the web server and a visitors computer and thus protected from eavesdropping, analysis and modification - things that have increasing importance as global mass-surveillance levels increase. Open source software and LetsEncrypt are both free which means people won’t have to pay for the privilege of security any more. If you’re not already running your site over HTTPS - not would be the time.
(1) secret.sqroot.eu is used as an example and is not a working website. To see how a LetsEncrypt validated certificate looks like, inspect the certificate of this blog (sqroot.eu).